This card is made from scraps laying around on my desk. These are pieces from the Emporium paper pack that I used to make the gate fold paper bag album posted yesterday. I ran the yellow scrap through my Cuttlebug in a Sizzix embossing folder before attaching it to the card base. I added a butterfly punched from the new Creative Memories punch and a stamped sentiment from CTMH From me to you set D1247. The inspiration for this card came from inkingidaho.blogspot.com. I have taken extra pictures this time, documenting my process for tying bows and threading ribbon through the bow to attach to the card.

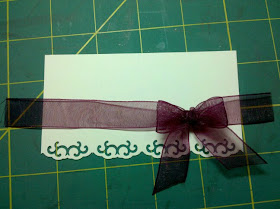
This first photo shows my bow tied around a home made bow easy type tool. I cut it from scavenged acrylic from packaging of pens bought at Sam's club. Recycling at its best. I tied the bow and then ran a dental floss threader through the the back of the bow. Put a second piece of ribbon through the eye of the threader and pull it through the bow.


This is the package of floss threaders I found at Walmart. I wish I remember where I first found this tip, I would love to give credit to them.

The other fabulous thing about bows attached this way is you can scoot them from one end to the other without losing the shape of the bow.

Hope this helps you tie fabulous bows, and use up some scraps in the process. Enjoy!

Great idea! Thanks for sharing. I love your blog. I just started one as well. You are very talented. If you don't mind I will follow your posts.
ReplyDeleteKelly
This is an excellent idea. Why didn't you ever teach me this before!
ReplyDeleteThanks, Kelly. Thanks for following me. I have subscribed to your blog also. Love your style and am gonna give your shutter card a try. Thanks Mom, I just learned it. Perfected it, and now I am teaching you.
ReplyDelete