Showing posts with label tutorial. Show all posts

Saturday, January 2, 2016

Up Cycled Craft Packaging to Mini Album


I went a little crazy at Scrapbook Expo last year, purchasing Darice embossing folders. So many beautiful patterns and the awesome offer of  "purchase multiples, get them cheaper". I have 6 sturdy cardboard packaging pieces, all the same size, just begging me to reuse not toss them. Ok, challenge accepted. 

I glued the short front flap of one piece to the backside of the next piece to create the hinge end of the mini album. I used an Elmer's X-treme glue stick. I love these and stock up on them each back to school sale time. 


With all the glued pieces together and the end squared up I clamped them with binder clips and let them dry overnight. 


I chose an older DCWV paper stack for my pages and cut them to fit the pages. Again using the Elmer's X-treme glue stick I attached all the patterned paper to the pages and trimmed the edges where needed. 


Here's a peek at the finished pages. 


And the beginnings of my cover. 


A little cover embellishment, so far.  (It's funny the pictures look so different because one is taken by lamp light and the final pic was taken by natural day light.)

This will make a great brag book to fill with pictures of my family. 


Find inspiration everywhere! Go... Create something fun & fabulous. Enjoy!

Sunday, May 26, 2013

Baking cabinet redo


This fabulous change was inspired by.....wait for it...... this pin on Pinterest. I know, no one is surprised. All of my best projects seem to come from an inspiration found on Pinterest. And I'm ok with that. I love Pinterest. I love access to all those amazingly talented and intelligent people who come up with all these great ideas. Keep up the good work people.

What you see above is my baking cabinet after I had my son cut some 1 inch square trim to fit just inside the border of the inside of my cabinet doors. I sanded and painted the trim with chalk board paint. I first determined where I wanted them mounted so that they would be right below the shelf when the door was closed. I mounted the trim to the doors using Gorilla Glue, swiped from hubby's tool box. Then I marked out the locations for my cup hooks and pierced a small guide hole with a pick or awl or some sort of pointy object out of my hubby's tools. I contemplated, just for a moment, using my piercing tool. Then scrubbed that idea because I didn't want to risk breaking or dulling it. No such concerns for hubby's tool. ;)

When I was this far done, I was happy with the organization I had gained, but it seemed bland. I wanted more punch. 


So, after a few moments of hemming and hawing, I decided to go all the way. In for a penny, in for a pound as they say. Plus my hubby working out of town made my decision a little easier. I subscribe to the principle that it is easier to ask for forgiveness than permission. I say permission only because he is a painter by trade, so if he was home he would have all kinds of concerns and probably much input also, about my ability to complete this project up to his snuff.

I did, in my humble opinion, a very thorough job of masking off both cabinet doors. I also lightly sanded the finish off of the inside of the door, the part I want to paint. (Later hubby was very glad to hear that I had remembered this step. Score one for me.)


First coat. I must admit I was nervous.


Second and third coats added following the instructions on the bottle. NOT! Sheesh, I read the instructions after I have rushed into coats two and three. I was supposed to let them cure for one hour between coats and on the second coat I was supposed to paint in a horizontal direction. I didn't do any of this. Oops. Thankfully it still turned out ok. Ssshhhh, don't tell my hubby, I don't want to lose my atta girl point I earned on the sanding step.


This is it, all finished. I love it. I haven't written on it yet because it says to let it cure for 24 hours before rubbing chalk all over it and wiping it off. Then it is ready for use and reuse. This direction I decided to follow. *face palm*


It definitely has punch now. I love the hook for holding my recipe card. 


Who am I kidding? I love the whole thing. I keep opening the doors just to stand and admire how organized and sharp they look. Now I need to replace all my old blue Tupperware lids with the new black ones. Now that would look really sharp!


Find inspiration everywhere! Go... Create something fun & fabulous. Enjoy!

Sunday, March 18, 2012

Card file


Pin It

I know you will be surprised to learn I was inspired to create this paper card file from this pin on Pinterest. I created it for my Cricut using Design studio and George basic shapes cartridge. My favorites.

This card file is holding 8 standard A2 sized cards and 8 envelopes. The cards are bulky and each has a ribbon bow or knot, giving them extra thickness, so if you had single layer cards it would hold many more. The finished size is 4.75 x 6 x 2 inches.


This is a peek at the back side. Every side is decorated, these cuts are on the Cricut .cut file also.

Below are lots of pictures to illustrate assembling all the pieces.


1. Score side 1.


2. Attach decorative layers to side 1.


3. Score side 2. Attach decorative piece.


4. Attach side 1 to side 2, overlapping as seen above.


5. Folding side 2 over side 1, run tape around all sides of tab on side 2 as shown above.


6. Fold tab from side 1 over taped tab from side 2.


7. Run tape around small side tab and across long end as seen above. (Remember you can double click on any photo's and they will open up bigger for you to see the details clearer.)


8. Flip the whole thing over and run tape around all sides of other small tab.


9. To easily attach the long taped edge to the inside of the file, this creates a sturdier bottom, I pushed the small tabs in (so they won't attach to the bottom before you are ready) and then I slid the long end inside and got it perfectly lined up before I sealed the tape to the inside of the file. Then from the inside I pressed the 2 small tabs down.


10. This is a sturdy bottom now. It supports the cards and envelopes very well.


Another view of the finished file.


And holding its loot. A ribbon around the whole thing, maybe a tag or some sort of label on the front side and it is all ready for gift giving.

As always, if you would like to create these for yourself just leave a comment on this post. Be sure to include you email address, and I will send you the .cut file.

Find inspiration everywhere! Go... Create something fun & fabulous. Enjoy!

Wednesday, February 1, 2012

Nugget Satchel


Pin It

I think this is just the cutest little gift bag, and I do mean little. It is currently holding two Hershey's nuggets. I was inspired by this pin on Pinerest. Her tutorial was simple enough but I thought I could make it easier by creating a Cricut .cut file. While I was recreating I made it wider so that it would hold a little candy.


Here is a side view. I took a few pictures of the assembly process in the case that you want to make some yourself, these will make it simpler.


After the purse part is put together, score the top decorative strip down the center. Take sharp tiny scissors and snip little sections out just wide enough for the long skinnier handles to slide through. Than tape half of the top decorative strip and adhere it to the out side of the purse. Repeat for the other side.


Slip the long skinny handle through the snipped holes just low enough so a brad poked through the outer decorative layer, the purse side and the handle strip will catch all the layers and hold them securely.


Here you see the brad from the inside. Now adhere a strip of super sticky red tape or skor tape to that half of the decorative strip and press it down over the brad backs.


Here is the flap closure attached to the back side of the purse and Velcro closure attached to the flap and the front of the purse. These Velcro dots are too much for this little paper purse, next time I will cut it in half.


And the money shot. The wrapped Hershey's Nuggets nestled in their new home. Sweet as can be.

This satchel .cut file is created on Design Studio using George Basic Shapes cartridge so if you would like to recreate your own gift purses, I am happy to share this with you. Leave your email address in the comment section of this post and I will send it out to you.

Find inspiration everywhere! Go... Create something fun & fabulous. Enjoy!

Thursday, February 24, 2011

2-5-7-10 box with paper roses

It's a crazy name for such a pretty gift bag. Split Coast Stampers newsletter revisited this oldy but goody this week. You can find the tutorial here and there is a link in the gallery to a youtube video also. I do love a good tutorial video.

Here is a close up of my paper roses and leaves.

Here is a side view to give you an idea of the dimension of the roses.

I started with two 3.5 inch squares and one 2.5 inch square, which I free hand cut into a rough scallop circle.

This is a detail shot of the free hand scallop spiral cuts I made from the outer edge all the way into the center.
The rolling starts from the outside, rolling towards the inside then hold it all together with a glue dot on the center circle area, pressing the rolled petals down into the glue dot. At this point I pressed the petals outward and rolling slightly for texture. Not bad for my first real attempt. A few things I will try next time. Using lighter cardstock or patterned paper (this was SU! cardstock,some of the thickest I work with) and I will cut a more precise scallop circle on one of my electronic cutters.

Find inspiration everywhere! Go... Create something fun & fabulous. Enjoy!

Saturday, September 11, 2010

Mini milk cartons with crate tutorial

I have had  many requests for this Cricut .cut file. I have really been enjoying all the comments and the traffic on my blog. Yahoo!
I have created my own .cut file, made a few changes that make it work better for me....plus this way it is my own work and I can feel free to share it, free-ly. ;)
So, enjoy the tutorial and feel free to leave me a comment requesting the .cut file. I will send out my version of the cartons with the crate now.
I am loving having these adorable bats on my desk to decorate all my Halloween projects. Aren't they the cutest? I cut these cartons in white just to test the .cut file, but when they came out perfectly I couldn't throw them away. So I inked the edges and added the rectangles of decorative papers to try to make them a tad more spooky.

This is the back side. Again using the brads to close the milk carton tops. The bats wings on the front cover the brad prongs, but still leave them easily open-able and reusable.
Now, on with the tutorial....which is picture heavy. Sorry.

Here we are scoring at .5, 1.5 and 3.5 inches.


Flip the .cut and score at 1.5, 3, 4.5 and 6 inches.


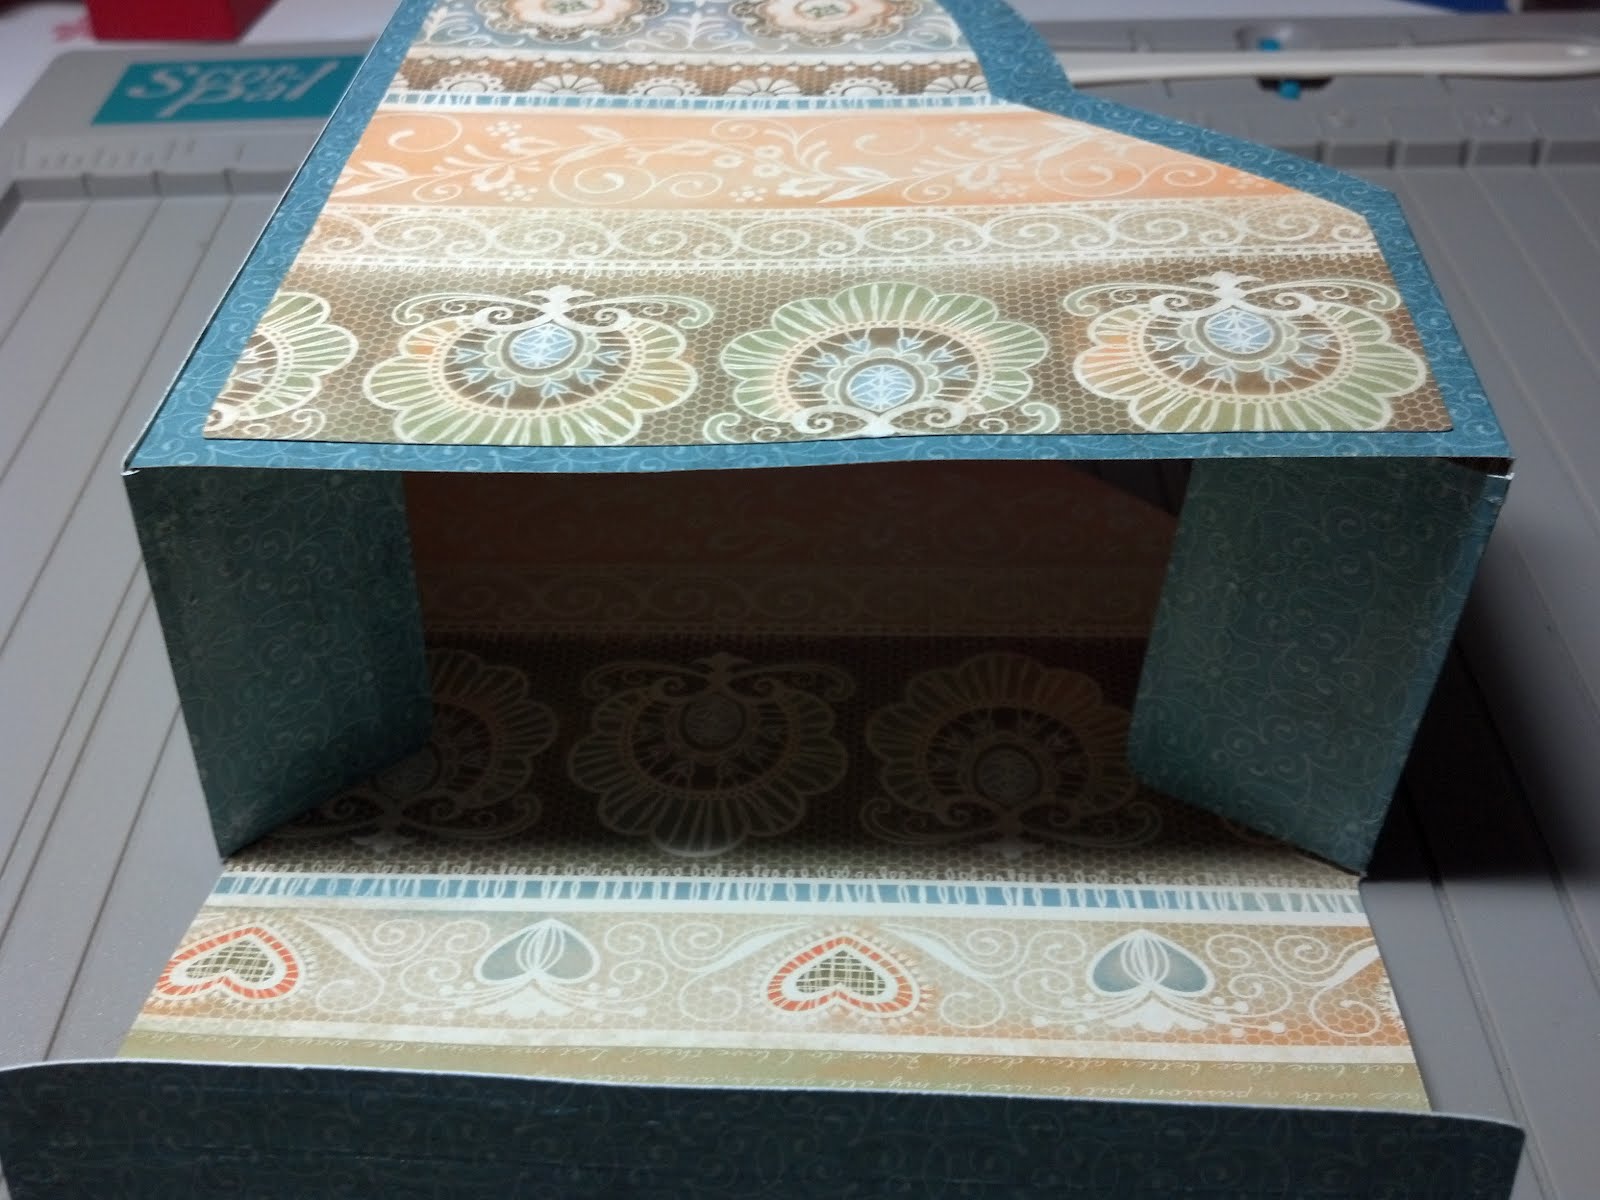
In this photo, I know its hard to see but I am trying to show the beginnings of the gable end of the milk carton. So I moved the .cut over to the .25 inch line on the scor-pal and then score just the top .5 inch section at the 2.5 and 5.5 inch lines.


Here the .5 inch marks are clearer. Now we rotate the .cut and starting at the bottom of the .5 inch score I feel around with my finger nail and attempt to get the angled line out to the corner (as seen above).


Rotate and repeat for the other angled score line. This is the most difficult part, trust me. From here it's all gravy baby.


Now we just fold all the scores, making crisp lines.

Use your favorite strong tape on the .5 inch tab along the side and tape the 3 sides of the bottom tab closest to the side tab.

I think the easiest way to line up the side is to fold the taped edge over to the center, then lay the opposite side over on top of the tape. Seems to work out nicely for me. Now fold in the two shorter tabs on the bottom, then fold in the taped tab and finally press the final tab down onto the tape. I use the handle end of my small Fiskars scissors to reach down inside the mini milk carton and press the bottom to ensure the tape is well adhered.
Now we start on the crate. Its quick and simple.

Score at 1 and 2.5 inches.

Flip and score at 1 and 4 inches. (Sorry, I have no idea why this photo won't load rotated to the correct orientation....its me, not you. But its late and I'm too tired to fuss with it. Please forgive me.)

I only add tape to the outer edges of the tabs. This lil crate really doesn't need any more tape then that.


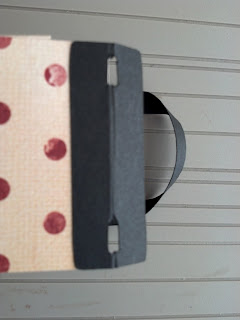
This is the long .cut that makes the handle for the crate. I attempt to center the ovals and then score evenly between them. Then I add tape, 1 stripe above the oval and 1 stripe below the oval.

Then fold the handle .cut in half, sealing the tape together. Score at 4.5 inches. Pressing a bit harder so that you crease through both layers.

I fold both tabs back to make a nice crease again. Then laying 1 tab back against the handle, see above. I run tape along both outer edges of the bottom tabs. Oy, as I read back through these they sounds so confusing.....I really do hope the pictures help.

To get the handle lined up properly I place a mini milk carton against the handle, folding the bottom flat underneath the carton and set it down in the base, with the carton snug up against the side. Then I test it by adding in the other carton, just to make sure they both fit. Its a tight squeeze. I have found that on the base as I am scoring and then creasing the scores if I score a little wide rather then exactly on the line, its a little more roomy with the cartons and the layers of decorative papers and all.
Wow, sorry for the long post. I hope this helps. I hope you enjoy playing around with them as much as I have. So many holidays, so easy to decorate these to fit all of them!
Find inspiration everywhere! Go... Create something fun & fabulous. Enjoy!
Related Posts Plugin for WordPress, Blogger...