Saturday, September 22, 2012

Christmas tags & tag gift box


I realize these are very unconventional Christmas colors. But bear with me, it's a pretty cool little Cricut project. I was inspired to make this tag gift set from this Pinterest pin. I was even inspired to use great paper with unusual colors from that pin.


Here is a view of the back.


And a view of the side and how the tags fit inside. There are 10 tags and the only embellishment is the ribbon and twine through the hole at the top of the tag. I let the paper be the focal point. 


Here are the fronts and backs of the 10 tags. I stamped the backs using CTMH stamps from two retired sets No Peeking and Winter Reflections with a new SU! Black ink pad. I have to say I am completely in love with the new ink pad and the ink formulation. It stamped perfectly all 10 tags, no light spots or missed portions. Just super crisp, fine lines and perfection. Now it did stain the heck out of my clear acrylic CTMH stamps. But I think it is a trade off I am willing to make for stamp perfection. 

I created this .cut file using Cricut George Basic Shapes cartridge in Design studio, and I am happy to share this file with you if you would like to make a gift set like this. Please leave your email address in the comments section below this post and I will email the .cut file to you.
 

Find inspiration everywhere! Go... Create something fun & fabulous. Enjoy!

 

Monday, September 17, 2012

More Mickey & Minnie Halloween cards


More Halloween Mickey mouse cuteness. I started with this card, and then wanted bigger Mickey and Minnie ghosts, so I created these cards also. Using my Cricut with the Disney Mickey Font and the Paper Doll Dress Up cartridges.


I thought I would keep this card more simple for giving to a boy. The sentiment is stamped with CTMH alphabet set and the candy corns from the retired October Word Puzzle set.


This card got a little more decoration, still using the same CTMH stamp sets. Just a border of stars and a button and bow. It's meant for a girl, so it needs a little bling.
 
 
Find inspiration everywhere! Go... Create something fun & fabulous. Enjoy!

Sunday, September 16, 2012

Washi tape Halloween decorations


Washi tape, oh Washi tape, how I love you! I only recently started my obsessive collecting of every beautiful design I can find. And I find more and more wonderful, fun, silly things to do with you. Like these banners for example. So quick to put together but they add such a happy silliness to my little vignette of holiday decorations. And all the poor naked tea lights I have displayed over the years. Well, no more. I saw this pin on Pinterest and new right away that my tea lights would be darling and decorated for the rest of my life. Because I am certain I have enough Washi tape in my stash to cover every tea light that I display and light for the remainder of my days.

Above I used black and white bakers twine from CTMH as the base for my banner. Their bakers twine is thicker than some others I have tried. I sometimes have a hard time threading a button with it, but it's very thick and sturdy for making banners. I also wrapped Washi tape around used and cleaned up Party Light glass candle holders. I then filled it 2/3rd's of the way with Epsom salt and wrapped a tea light with coordinating Washi tape and set it inside the glass on top of the salts. Easy. And I can strip it off and change it with the holidays, too.  


Here is my beloved family heirloom china hutch all decorated for Halloween. I know its early but the Pinspirations have been flowing and I just can't seem to help myself. Plus there might be just a touch of wishful thinking too. If I start decorating for fall it will start feeling like fall, right? I mean Starbuck's has the pumpkin spice flavors and cranberry orange scones back on the menu so that has to mean fall. That's my story and I'm stickin' to it.


Find inspiration everywhere! Go... Create something fun & fabulous. Enjoy!
 

Saturday, September 15, 2012

Mickey & Minnie Halloween card


I have been enjoying all the tweets and facebook updates and emails about Disneyland getting all decked out for Halloween. They started this week and every day there is more and more darling decorations I get to see in pictures. One of these days I will be there during this time of year again. Until then I live vicariously and I am inspired to create a little Disney magic around me. This card came from that inspiration. Aren't they cute?!


I cut the pair on my Cricut using Disney Mickey Fonts and Paper Doll Dress Up cartridges. I really love how they came out.

I stamped the background and the sentiment and even the cobwebby design on Minnie's bow using CTMH's retired Thriller and October Word Puzzle stamp sets. Thriller has a very Haunted Mansion/Nightmare Before Christmas feel to me, so it was perfect for the background.

I am happy to share this Cricut .cut file with you if you want to create a little Disney magic at home, of your own. Leave me a comment below including the ever important email address and I will send it to you.  
 
 
Find inspiration everywhere! Go... Create something fun & fabulous. Enjoy!
 

Saturday, September 8, 2012

Another homemade embossing folder


I was inspired to create this embossing folder and make these cards from this card I found on Pinterest. I wanted more leaves for my embossing too. I found two great leaves on the newest CTMH Artiste cartridge. 


This card I stamped first. I tried the baby wipes technique, where I dropped dots of CTMH Sweet Leaf, Creme Brulee and Tulip reinker ink onto a baby wipe than used that to ink up my stamps. It did not come out very defined, more light and water color-ish, but I'm OK with that. Then I ran the paper through the embossing folder. Finished it up with the stamped sentiments, a little ribbon detail and some bling.


This one I ran paper through the Cuttlebug in the homemade embossing folder. I then used sponges and dabbed ink on the paper while it was still closed in the embossing folder. Stamp, ribbon and bling it up again and it is good to go.


Here's the 5 x 7 inch folder with the paper after it has run through the Cuttlebug.


Here the top is fit snug around the embossed paper, so I am able to sponge on the ink and keep crisp lines still.


Voila! Finished. I like this style best so far, but I have to try the stamping again, maybe skipping the baby wipe technique so the stamped leaves are bolder.

Now, normally I always share my Cricut .cut files.....but my computer had a hic-up after I was done cutting and it locked up. So I had to hard boot and I had never saved the file. Lesson learned. Save often during the designing and testing process so you don't lose your work. Thankfully I was done cutting the basics of this embossing folder, I did have to hand trim the two extra layers of recycled Cheese-Its box that makes my homemade embossing folders the same thickness as the store bought ones. But that was simple enough. I am sorry I don't have a .cut file to offer to share this time. Next time for sure.

Find inspiration everywhere! Go... Create something fun & fabulous. Enjoy!

Thursday, September 6, 2012

Halloween treats decorated with washi tape


I have collected a small hoard of Washi tapes thanks to groopdealz.com. So I put them to use here on a little Halloween gift card and treat bag. I used CTMH Gypsy, Sunset, Pear and Black inks to stamp all the cute designs from the CTMH Perfect Fit-Halloween Holiday stamp set.


This card was inspired by this beauty I found on Pinterest. I knew it would be perfect for Washi tapes. Thankfully the Washi tape was so easy because sewing all those buttons on with CTMH Baker's Twine took some time. Again I used the same inks and stamp sets for the sentiment.


This is the inside of the card. I had to show the rock n roll technique I used for the big sentiment and the little embellishments to the inside with some of the other stamps from the set. I really like how these came out.

Find inspiration everywhere! Go... Create something fun & fabulous. Enjoy!

Wednesday, September 5, 2012

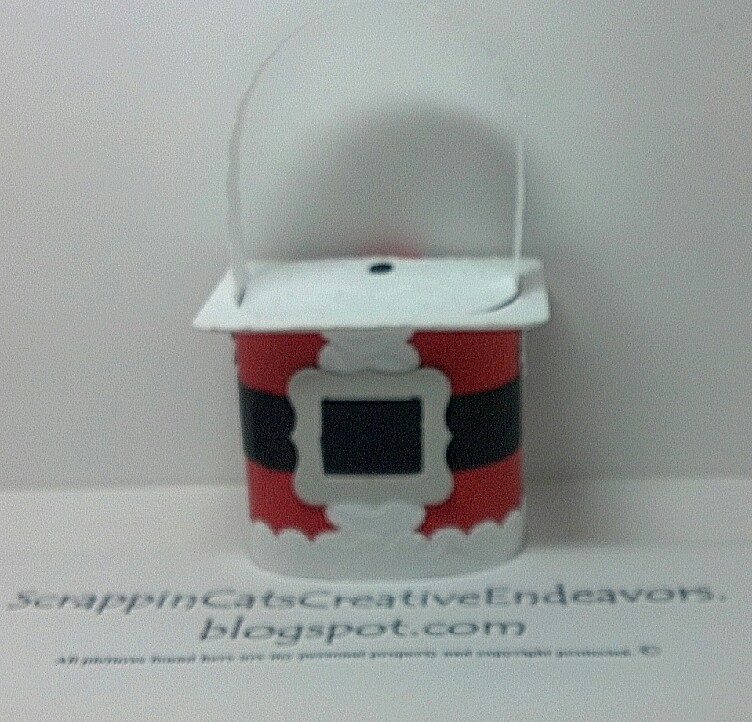
Santa basket from altered yogurt cup


I am altering yogurt cups again. This one is supposed to be a chubby Santa belly. I start with a Dannon yogurt cup washed out after eating up the nummy yogurt. It's the easiest to cover because it has straight sides, no slant. So I cut a nice easy 2.5 x 8.5 inch piece of cardstock and I use the super cheap glue sticks that I just picked up a dozen of during the back to school sales as the adhesive to attach it to the cup.


I did something new with this one. I created a lid out of cardstock. I used the foil piece as my cutting guide.


Here you can see it lifted and my ribbon pull I used to open it. It naturally stays closed once you push it down because of the handles, they cause just enough tightness to keep it down in place until you pull it open with the ribbon tab. Fill it with candies and it will be an easy and green party favor.

Find inspiration everywhere! Go... Create something fun & fabulous. Enjoy!
Related Posts Plugin for WordPress, Blogger...