Thursday, May 10, 2012

Scraps card


Oh, how do I love that everything on this card was made from scraps!?! Ok the ribbon is from my most recent Reason Ribbons monthly club pack and the card base is new, but everything else was literally sitting on my work space, left overs from prior projects. The flower and butterflies are from here and the sentiment shape is from here. It was my first test cut, and I decided it was not big enough, so I saved it and cut it again larger for the project. The most wonderful scrappy piece was inspired by this pin on Pinterest. Have I said lately how addicted to Pinterest I am, and how amazed I am by all of the beautiful inspiration I find there, daily? There are some amazingly talented generous people out there that I would never get to see and be inspired by their work except on Pinterest. Yahoo!


This is a close up of the strips, mine are random, meaning I did not measure to .25 inches exactly as the original tutorial creator did. Then I taped them down to a scrap piece of paper and when I had filled it in completely I ran the whole thing through my Cuttlebug in my Sizzix swiss dot embossing folder. I inked the edges, layered it on a hot pink card base, embellished to within an inch of it's life and Voila! A masterpiece of scraps that might have otherwise ended up in the garbage.

Find inspiration everywhere! Go... Create something fun & fabulous. Enjoy!

Saturday, May 5, 2012

Altered bakers twine storage and gift boxes


I have recently purchased some really gorgeous bakers twine. I got a great price at Groopdealz on several spools of The Twinery colors. Too much twine for me to use alone so I decided to share with some crafty friends. I saw this great upcycled packaging for twine pinned on Pinterest, and couldn't wait to try it. I have been saving these SU! packaging cups forever knowing there would be just this kind of upcycling project to make. I also used a Crystal Lite package for the tall one. Then I used my Crop-o-dile to punch holes and add the eyelets to each container. I have 10 spools of twine so each stack has 10 holes. The SU! cups have 1 hole on the front and 1 down the back.


This is to show the little bit of decorating I did to the tops of the containers. I used some pretty papers I received for my birthday and punched circles and scallop circles to layer. I added lengths of ribbon from my stash and they are finished.


These are the little gift boxes holding the twine packages. I was inspired to create these on my Cricut by this pin on Pinterest. I used all new CTMH Dotty For You papers for these boxes. They are gorgeous and a nice thick weight. The finished size of the two smaller boxes is 3 x 3 x 4.5 inches and the taller box is 3 x 3 x 6.5 inches.


Here is a detail shot of the tallest box holding the upcycled Crystal Lite packaging twine dispenser gift. I used CTMH Sweet Leaf ink to stamp the sentiment from CTMH 4 My Friend stamp set. Add some doodle dash marks and a bow from the twine and they are ready to give.

The boxes are designed for the Cricut machine using Design Studio and George Basic Shapes cartridge. As always I am happy to share this .cut file. Leave a comment below, including your email address, and I will send it out to you.

Find inspiration everywhere! Go... Create something fun & fabulous. Enjoy!

Saturday, April 28, 2012

More elongated penny bracelets


I started these bracelet's last week, you can see it in this post. And as is my typical fashion I kept going and making more and more. So now I have one with pennies from our 20th wedding anniversary trip to Maui. Yep, that makes me smile every time I look at it now.


And I reworked the original Disneyland bracelet and added a second strand of Walt Disney World pennies. I really love this one too. I have worn the single strand of Disneyland pennies to work a few time this week and always get compliments and curious inquiries. So I get to talk about my favorite things, a lot. ;)

Find inspiration everywhere! Go... Create something fun & fabulous. Enjoy!

Sunday, April 22, 2012

Elongated penny charm bracelet


This is by far one of my favorite crafts I have learned about on Pinterest. I love elongated/squished/pressed pennies. Whatever you call them, they are such a fun souvenir and quite addictive. There are whole websites dedicated to them. These are a few of my favorites here, here and here. I have hundreds possibly a thousand. I have been collecting for certain since 2000 but I have a couple that predate that. But other than storing them in the penny books by date and event that I collected them, I have never done anything with them. Until now. Yahoo!!! Now I can wear my beauties and every time I look at them they will remind me of a wonderful trip.


My first bracelet is all Disneyland pennies. They are all duplicates from my collection. When my sons were young they wanted to collect their own, now that they are older they don't care about them anymore. So I have taken eight of the duplicates or even triplicates and made my first charm bracelet. I love it!


I found all the jewelry making components I needed at Michael's. They had everything in copper, so that was nice. I love the bracelet closure that I found, it is a ring and the other end is a bar that goes through the ring and then when flattened out it won't fall through. Best thing is that it makes it very simple for me to put it on all by myself. Which is important because I won't wear this continuously, so getting it on and off easily is a bonus.


I used my crop-o-dile to punch the holes in the pennies. I don't know where I got the idea to do that, because now as I review the tutorial on the Pinterest link, it doesn't say anything about a crop-o-dile.  But it worked like a boss and I did not have any sharp edges on my pennies.

I have plans to make another one with pennies from my trips to Maui and Walt Disney World. And from now on I will intentionally collect some duplicates so that I have some to collect and some to create with.

Find inspiration everywhere! Go... Create something fun & fabulous. Enjoy!

Friday, April 20, 2012

Gift box made with scallop envelopes


I found this cute little gift box on Pinterest of course, and although the website it links to is in french the designer was wonderful enough to include a .pdf and picture tutorial so it was easy to figure out. I designed this on my Cricut using Design studio and George basic shapes and Mini monograms cartridges.

I am using just one of the beautiful new CTMH papers called Dotty for you and the cardstock is CTMH Hollyhock. These are gorgeous cardstock weight double sided papers. So the butterfly is on one side and the pretty yellow polka dot is on the other. Lovin' them.


This is the side view. There you can see a bit of the scallop top of the envelope folded in on the sides. The finished size of the little gift box is 3.25 x 3.25 x 6 inches.

If you would like to have this .cut file leave a comment below, including your email address and I will email it out to you.

Find inspiration everywhere! Go... Create something fun & fabulous. Enjoy!

Wednesday, April 18, 2012

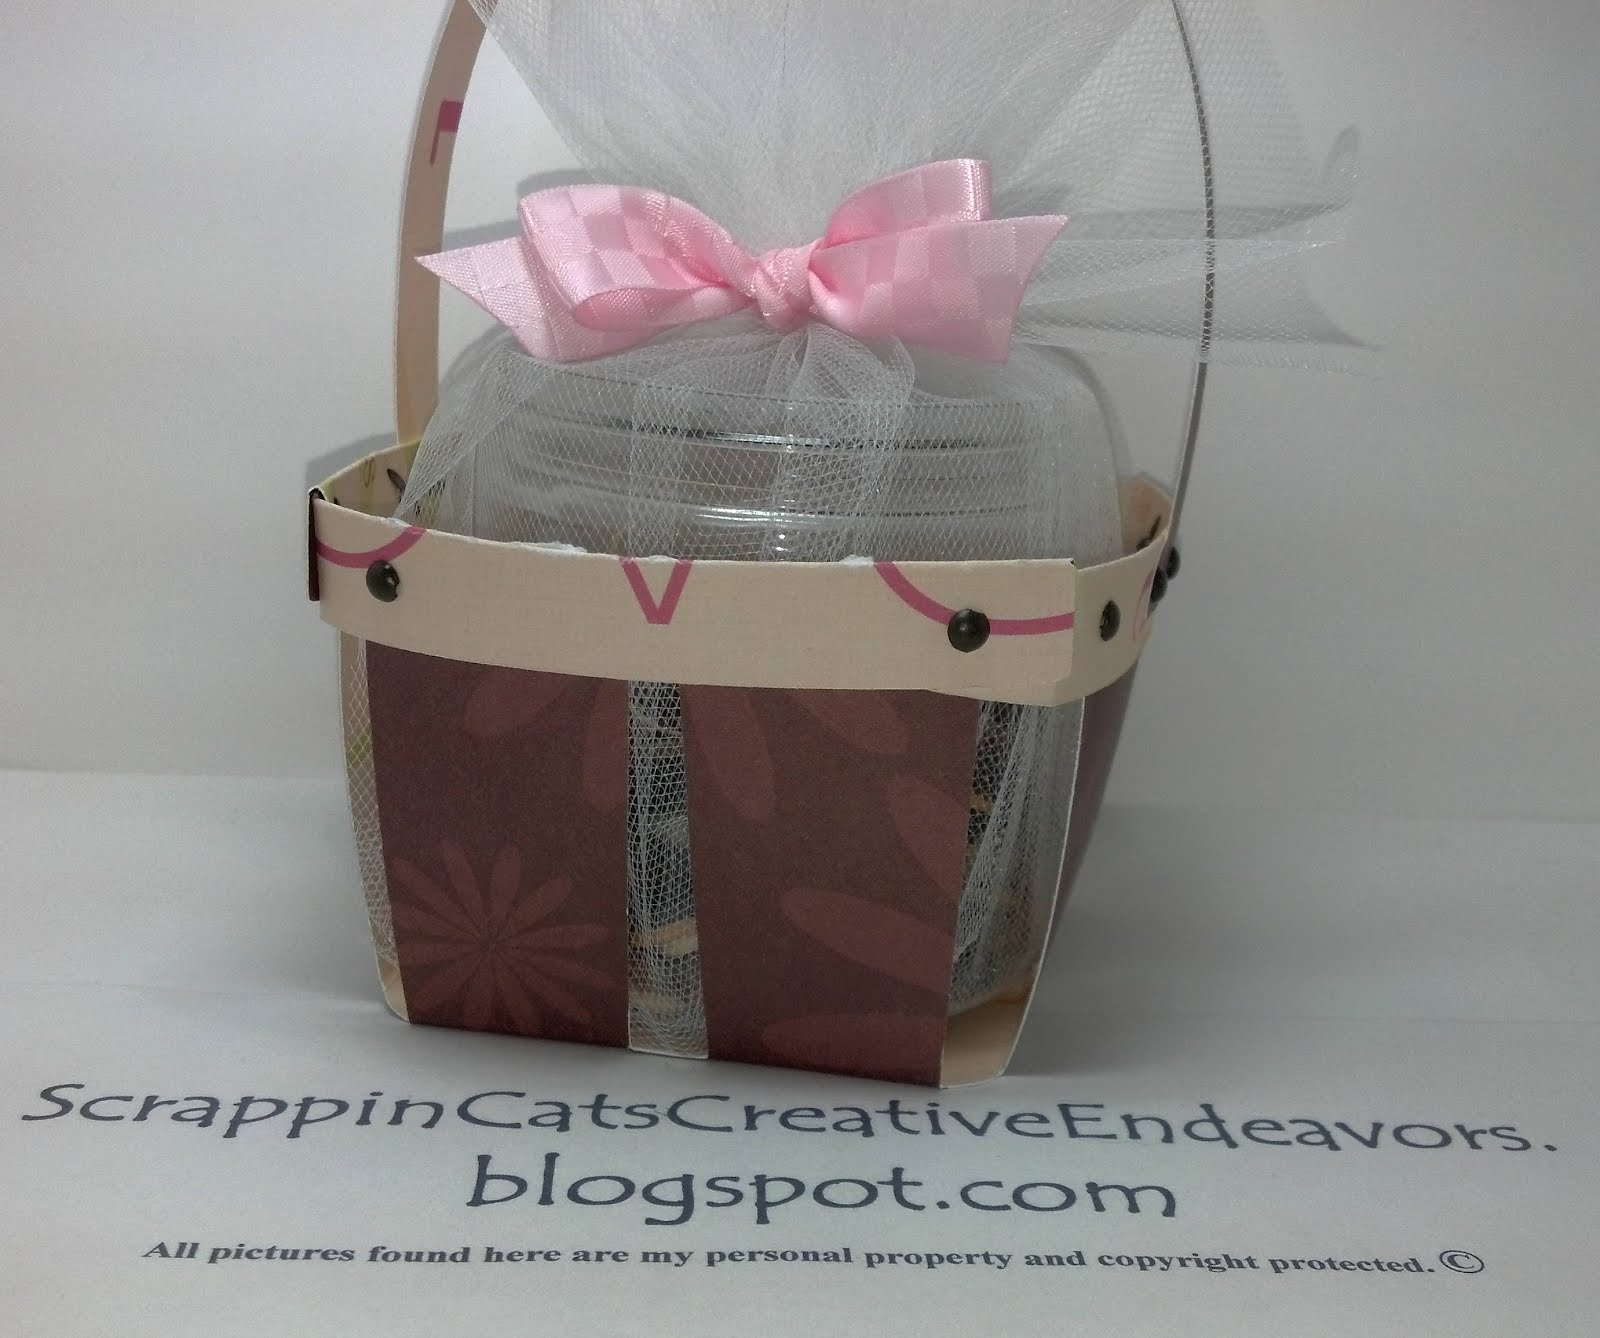
Paper strawberry basket


This sweet little gift basket was inspired by this pin on Pinterest. I designed it on my Cricut Design Studio software using George basic shapes cartridge. It came together first try, that rarely happens. Usually I test cut, tweak a few things, test cut, tweak....lots of wasted paper. But not this time, thankfully.


Here's a close up to show the sides and the brads that hold the whole thing together. There is a top that folds over to give additional strength and stability to the top edge of the basket, so it is nice to use a double sided paper for pretty contrast. I used CTMH brads and paper from a very old paper stack, but I believe I still see it in Joann's it's called Chocolate Neopolitan by K & Co..

The finished basked it 3 x 3 inches. Perfect for a little tub of bath salts or buttons and twine. I wrapped mine up in tulle and tied it with a pretty satin bow from my latest Really Reasonable Ribbons monthly club selection. So pretty.
As always, if you want to create using my .cut file, I am happy to share. Leave a comment below with your email address and I will send it right to you.

Find inspiration everywhere! Go... Create something fun & fabulous. Enjoy!

Sunday, April 15, 2012

Party favor bag


Here's a little gift bag I designed and made on my Cricut. I was inspired by this pin on Pinterest. I designed mine to be 3 x 3.25 x 2 inches. It will be perfect for a gift card and a little chocolate or maybe a little selection of twine and buttons.


The scallop circle is scored and then taped to the back part of the bag. The flap is held closed with a velcro circle and a brad.

If you want my simple party favor gift bag .cut file, I can send it to you. Leave a comment with your email address and I shall send it out.

Find inspiration everywhere! Go... Create something fun & fabulous. Enjoy!
Related Posts Plugin for WordPress, Blogger...