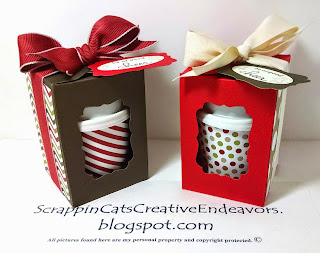
I was inspired to create these little thank you gifts by this pin on Pinterest. The designer of this box had a very basic measurement and instructions on her post. The first one I made I followed her instructions exactly. I found the box to be a little to big for my mini coffee cups, they moved and tipped inside the box. So with lots of trial and error, thankfully using ugly paper, I finally came up with a smaller box. The cool thing about this box is that you can slip a gift card down inside the box, between the mini coffee cup and the side with no window punched in it.
My measurements for the box are 9 inch square of cardstock, punched and scored at 2 inches on all four sides, then flip the paper over and punch and score all sides at 2 inches again, using the envelope punch board. I cut along the score lines for 2 opposing sides, and for the remaining 2 sides I trimmed about .25 inches away from the score line (this is where you will place your tape to hold the box together). Then I used my SU! Decorative Label punch to make the windows on 2 sides. I added some designer series papers to the plain sides and added my tag made from the Decorative Label punched pieces with a dimensional. I didn't use any adhesive on the top of the box, just closing it with ribbon tied in a bow.
I found the template for covering the mini coffee cups here, although I did find it a little short for my cups, so i lengthened it by .50 inch to have a little more overlap for taping to the cup. I filled my cups with Hershey's Nuggets and Kisses decorated with matching designer series papers.
Find inspiration everywhere! Go... Create something fun & fabulous. Enjoy!


