Monday, March 24, 2014

Embossed banner cards


I had all these beautiful 1 x 2 inch pieces of patterned paper left over from several projects lately. They were sitting on my work surface just tempting me to find something wonderful to do with them. So off to Pinterest I go, of course, and I found this idea. Bingo!! Just what I wanted.


I punched all the banner tails using a arrow punch, but you could also use a square punch. It makes each shape the same, if you like that. Otherwise snip them with your scissors, that works too. 


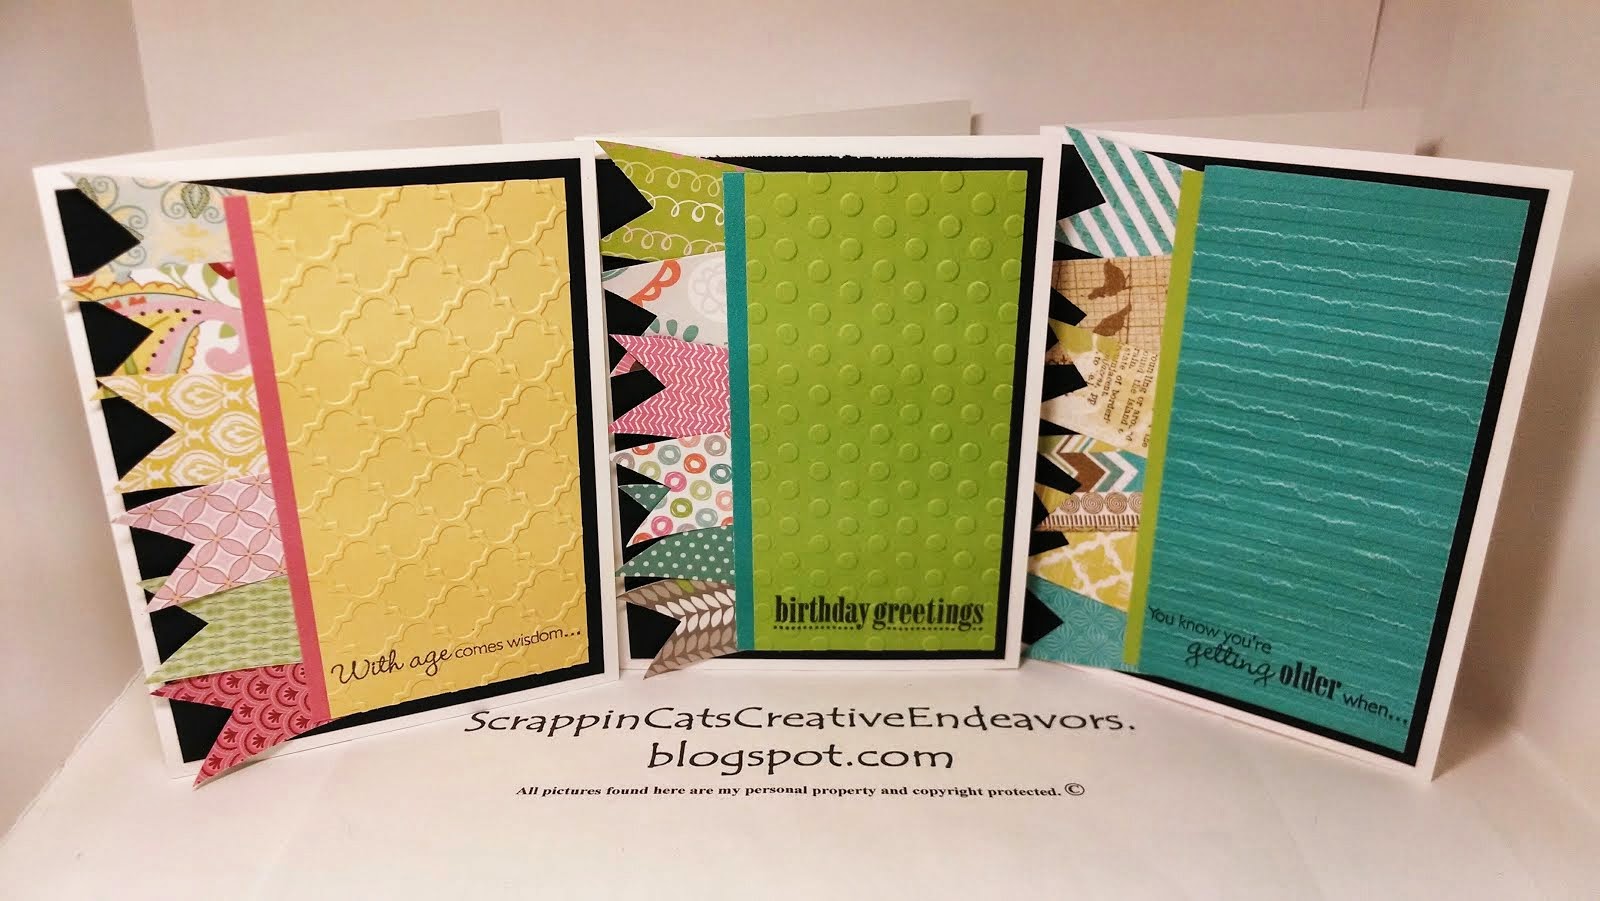
I loved this bright and pretty CTMH paper packet. It's retired now, but I can't waste and inch of it. 


I used all of the new CTMH embossing folders for this set of cards. The stamps are all from CTMH Just A Number set. I used CTMH Black ink to kind of tie in the black layer behind the banners and embossed piece.  

Find inspiration everywhere! Go... Create something fun & fabulous. Enjoy!

Saturday, March 22, 2014

More embedded embossed cards


More card sets for gift giving. These showcase the adorable CTMH Lollydoodle paper packet. All of the cards have been embossed with the new CTMH 5 x 7 embossing folders. These things are awesome. This card was embossed using CTMH Chevron folder.


These showcase the CTMH Jubilee paper packet and I embossed them using CTMH Stripe folder. 


These are made with the CTMH Skylark paper packet and embossed with the CTMH Quatrefoil folder.


These are using the CTMH Balloon Ride paper packet and embossed with the CTMH Dot folder.


And finally the beautiful CTMH Araina paper packet here, embossed with the CTMH Damask folder.


These cards are quick to put together and beautifully show off different patterns from the CTMH paper packets. I really like these for gift sets, for friends.


Find inspiration everywhere! Go... Create something fun & fabulous. Enjoy! 

Friday, March 21, 2014

Embedded embossed Ivy Lane cards


The inspiration for this newest batch of paper packet sample cards came from this card design I found on Pinterest. Her blog post included measurements and wonderful time and supply saving tips. I really appreciated her detailed post and photos.


I love the embedded embossing technique and its even more fun now that I have some of the CTMH embossing folder. 


For this set I used the Chevron pattern.


I added some CTMH Blush and Hollyhock card stocks and Black and Pear inks. The sentiments came from various CTMH stamp sets.


Find inspiration everywhere! Go... Create something fun & fabulous. Enjoy!

Sunday, March 16, 2014

Scallop tag closure card


Yahoo! I am so excited. This is my first project done on Cricut Craft Room. (Yeah, yeah I know....a little late to the party. But better late then never, somebody has said before.) I was inspired by this beautiful card created by my CTMH upline Debbi Fournier. She shared her file and knowledge, tips and tricks and so I gave it a go. It was easier than I expected and since I already love working in the Design Studio it was pretty easy to figure out.


I used a retired CTMH paper packet for my test runs, just in case I messed up or didn't love it. Guess what? I didn't mess up and I love the finished cards.

For this card I used CTMH Outdoor Denim, Honey and Cranberry inks, on Pinwheel and It's Your Day retired stamp sets.


Here is my second card, still using the same CTMH paper packet and inks, minus the Cranberry for this one.


Different sentiment stamps though, from CTMH Hooray Bouquet and Celebration stamp sets.

I love these unique shaped cards and I think with this selection of papers and colors they make for nice gender neutral birthday cards to have on hand. I will be making more of these. Thank you Debbi, for the inspiration and instructions. I truly appreciate it.


Find inspiration everywhere! Go... Create something fun & fabulous. Enjoy!

Thursday, March 13, 2014

Explosion box


Another true confessions moment, this is my first explosion box. I know these have been around for years now, and I love them. I have pinned several versions. I have seen some fabulous ones made into mini albums. I just never got around to making one myself. Until now.

I saw this one, and on her very next blog post she posted these simple instructions. I already had these pretty coordinating papers out from this project, so it was like the perfect storm. I whipped this up in no time. 


I made all four sides into pockets. I even used my deckle edge scissors to cut the pocket edges.


Each of my pockets holds a stamped piece of card stock with a punched circle that I folded in half and adhered as a sturdy pull tab. The pockets are just wide enough to hold a gift card also. Embellish with a sentiment and some paper flowers and bling for their centers and then finish it all off with a big silk bow. It is ready for gifting.


Find inspiration everywhere! Go... Create something fun & fabulous. Enjoy!
Related Posts Plugin for WordPress, Blogger...