Tuesday, February 28, 2012

Stash building cards


I have been card making at work, on lunch break. I have to say it has been so wonderful. My friend and I have brought a small stash of coordinating items and we choose an idea off of Pinterest and we make several cards from the same idea. Keeping is simple and using the same coordinating items for all of them allows us to complete a set of cards in roughly one week, usually.

This first set was inspired by this pin on Pinterest. I used DCWV paper from the Linen closet matstack. Then I switch up the sentiment, the ribbon and the edger I used across the bottom of the paper piece.


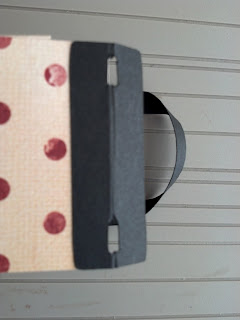
Here is a close up of one of the combinations.


This is my second set. Inspired by this pin and this pin on Pinterest. Again using DCWV papers this time in the Flower shower matstack. Again using a variety of stamped sentiments, edge scissors or border punches and ribbon and flowers to embellish, but the overall design is the same.


Here's the close up.  I lucked out that the felt flowers perfectly coordinated with the Flower shower matstack colors.


This is the third design we completed. This was inspired by a card I made at a SU! stamp a stack function a few weeks before Valentine's day. We took our measurements from that card and just recreated it with patterned paper from DCWV the Spring matstack collection and some more Flower shower papers too. We stamped the little corner shwoopy detail and the sentiments. Used the SU! punch and inked all the edges before putting the layers together.


Here is the close up of this card design. All of these cards are standard A2 size. We used somewhat generic sentiments on the outside and left the insides blank so that as we need them, we can grab them and personalize them to the situation that's needed.


Find inspiration everywhere! Go... Create something fun & fabulous. Enjoy!

Sunday, February 26, 2012

Easter shape cut out card toppers


Pin It

These cards where inspired by this scrap stash using idea and this card on Pinterest. I had my box of yellow scraps out and have been cleaning them up into usable pieces and such, according to the blog post I pinned on Pinterest. I have a tendency to save anything that might be used for a punch or anything later on, so needless to say I am drowning in scraps. So I was purging, with the intent of also making some of the strips for the ideas she showed at the end of the article. Then I saw the cut out card with the strips behind, and decided at least for these gorgeous yellows I wanted to make some Easter cards. I am really happy with how they turned out.


For both cards I used my Cricut Design studio and the Easter 2010 cartridge. The cards are standard A2 sized cards. I used a glue stick to attach each of the strips to another scrap of paper. For the bunny I glued the white cut out piece over the strips piece and then ran the whole thing through my Cuttlebug with a dots embossing folder. Ink the edges with sunny yellow chalk ink. Layer it on some cardstock. Embellish with CTMH creme brulee paper flowers and some yellow pearls and ribbon from my stash. And call it done.


The egg cut out and the grass are also on the Easter 2010 cartridge. I inked the edges with a baby blue and a little sunny yellow and glued all the layers together.

Find inspiration everywhere! Go... Create something fun & fabulous. Enjoy!

Thursday, February 23, 2012

Angle top box


Pin It

This little box was inspired by the darling template available at this pin on Pinterest. I have been hoarding this beautiful Basic Grey Urban Prairie paper pad forever. But I thought this adorable box was the perfect spring time gift packaging, and what better paper then gorgeous hot pinks and yellows and flowers and butterflies? Nothing could be better.


Here is the side view, it explains the name. Angle top box. Pretty cool idea, huh? I love Waltzing Mouse blog and stamps and her templates too. Such unique ideas. I took her template and translated it to a design for my Cricut using Design studio and George basic shapes and the fancy top and bottom are cut from Martha Stewart Seasonal cartridge.


Here is a view of the interior and the how the lid flaps up too. The finished size is 3.5 x 3.5 x 2.5 inches.


Here is a view of my embellishments on the top of the box. I am loving this string gathered ribbon, it makes such a pretty bow. And I layered many different paper flowers and added some pearls.

As always, I am happy to share my .cut file. Leave a comment on this post, that includes your email address and I will send it out to you.

Find inspiration everywhere! Go... Create something fun & fabulous. Enjoy!

Wednesday, February 22, 2012

Teddy bear shaped card


Pin It

Isn't she sweet? I was inspired to create her on my Cricut Design studio by this pin on Pinterest. I have not done much paper piecing at all, but her shapes were so easy I knew I could handle this as my first attempt. I am not very good with the chalk shading, that needs a lot of practice but I still think she is sweet and would be adorable for a baby birthday or even just a "sending you a bear hug" card for a friend. I did create an arched card liner for the inside since the card stock is so dark.

I used the CTMH Art Philosophy cartridge to create this card, so if you would like my Design studio .cut file leave a message on this post. Don't forget your email address. So I can send the .cut file out to you.  

Find inspiration everywhere! Go... Create something fun & fabulous. Enjoy!

Tuesday, February 21, 2012

Scrappy happy card


This 5 x 7 card was inspired by this pin on Pinterest and a stack of small scraps left from a mini album project I had finished a long, long time ago. I am cleaning off my scrap room desk, and as you can see, I am easily distracted from the task. I keep finding pretty things and my creativity soars. It helps my creativity in two ways to clear away the clutter. :D Yeah! Decluttering for the win! 

Find inspiration everywhere! Go... Create something fun & fabulous. Enjoy!

Monday, February 20, 2012

Accordion top box


Pin It

Yea, spring colors. Bright flowers. Not that I don't love the grey, fog, rain or wintry weather, I do. But these colors just put me in the mood for spring time. This is my altered mini milk carton Cricut .cut file, I had originally made for this project and this project inspired by Youtube videos. And now it has been altered again. I was inspired by this pin on Pinterest. I just love gathering great ideas from all over the internet.


This just shows you that the lid lifts off instead of having to untie the pretty bow to reach the goodies held within. The finished size of the accordion top box is 3 x 4 inches. The yellow portion of this box is 3 inches around and 3 inches high, the lid adds another inch of height when it is on top of the box.

This is my personal creation on Cricut Design Studio software using George Basic Shapes and MS Seasonal cartridges, I am happy to share it with anyone who would like it. If you want to make some accordion top gift boxes of your own leave me a comment below including your email address and I will send it to you.

Find inspiration everywhere! Go... Create something fun & fabulous. Enjoy!

Saturday, February 18, 2012

Easter Mini Milk cartons and Whopper carton


When I saw this adorable mini milk carton idea, I couldn't wait to alter my Cricut .cut file so that I could recreate this little cutey. But why stop at the mini milk carton size? I decided to alter my whopper carton also.


Pin It

The inspiration piece was so darling I did very little to alter it. You can see the back side of them has the beautiful SU! happy Easter stamp, that was the creators brilliant idea. And if you enlarge the photo (by double clicking on it) I hope you can see the partial bunny face peeking around the side of the mini milk carton. I did embellish a little more with punched flowers and butterflies and a scallop circle base. My ribbon is some darling .25 inch pink gingham pull string bow maker ribbon. So those fluffy bows were very simple to create. I just cut 18 inches of ribbon with the string attached, run it through the holes in the lids of the containers and then pull the string to create all the loops. Tie the string in a little bow (that's so when Easter is closer I can load these containers with Whopper's robins eggs or jelly beans. Don't want them to get stale, or worse yet, eaten too early.)

The mini milk carton Cricut .cut file was designed using George Basic Shapes and Martha Stewart Seasonal for the grass and the scallop circle. The whopper carton also uses those two cartridges but also Plaintain Schoolbook. If you want either or both of these Easter .cut files leave me a comment including your email address and I will send it out to you.

Find inspiration everywhere! Go... Create something fun & fabulous. Enjoy!

Friday, February 17, 2012

Valentine cards for my guys


These are the gift card holders I made for my guys. Yeah, not fluffy sweet Valentine colors, but they are not fluffy sweet Valentine types. Both my teenagers loved these Valentine's, they were hits.


Here the cards are out of the coin envelopes I first debuted here and here. They are the perfect size for a dollar bill folded in quarters or a gift card to be tucked inside.


Pin It

This is the simple card I made for my husband, I know I got the idea off of Pinterest but now I can't locate the pin anywhere. (Possibly that's what happens when you have nearly 4,000 pins.) *added later this evening. I found the Pin on Pinterest so I can link back to the original creator. And OH MAN!!! when I went to her post for this card there are like 6 more similar cards using the SU! punch and all of them are gorgeous. Be sure to check her post out. It's very inspirational.
I tried really hard to keep it masculine. The embossed hearts might have gone overboard but it is Valentine's day so certain concessions have to be made.

Find inspiration everywhere! Go... Create something fun & fabulous. Enjoy!

Tuesday, February 14, 2012

Valentine's circle border cards


Oh goodness, I really must stop making Valentine's cards. I have more than I can use and I will have to store them for a long while before it is time to donate to Operation write home. But I am so inspired by what I find on Pinterest, and by beautiful Valentine's colors and papers.


Pin It

This card style was inspired by this pin on Pinterest. I loved the overlapping circle border with the smaller circles inset on each part of the border.


Pin It

And this one was inspired by this pin. Both of these card borders appear to me to be made from the same border die maybe. I wasn't really sure, but I was certain that this would be very easy to create on my Cricut. And I was right.

So I used my Design Studio software and George Basic Shapes cartridge and using 1 inch and .75 inch circles overlapped a bit to create the border. Then I also created the smaller circles to glue into the center of the borders circles, and even the little heart you see on the third circle from the bottom of the first card. They are all part of the Cricut .cut file. It could not get any easier. It was also awesome to dig through my paper scraps and find white 3 x 6 inch paper for the borders and 2 x 3 inch patterned papers for the decorative circles on the first card. I used CTMH stamps and Tulip ink, and the brads, buttons and ribbon are all from my stash.

If you would like the .cut file for your own creating, I am happy to share. Leave your email address in the comments below and I will send it right to you.

Find inspiration everywhere! Go... Create something fun & fabulous. Enjoy!

Sunday, February 12, 2012

Valentine tuxedo gift box


Pin It

This candy box was inspired by this pin on Pinterest. It was soooo cute, I knew I wanted to copy it, making a .cut file on my Cricut. I designed this with Design Studio using George Basic Shapes. I used small CTMH button shaped brads and pretty ribbon from one of my recent Reasonable Ribbon club collections to embelish this up.


Here is a view from the top, showing the box part, where there is a 3 inch cello bag full of Hot Tamales candies and tied with some silver elastic cording. The finished size of the box part is 2 x 3 x 2 inches. The heart is 4 x 3.75 inches.

If you have Cricut, Design Studio and George Basic Shapes and would like to make these for Valentine's, anniversary, prom or graduation gifts for the men in your lives, I am happy to share. Leave a comment below with your email address and I shall mail it to you.

Find inspiration everywhere! Go... Create something fun & fabulous. Enjoy!

Thursday, February 9, 2012

Pazzles Valentine's gable box


Pin It

This was the Pazzles project my mom and I completed during the Super bowl. We worked during the game and stopped everything when the commercials and any of the singing performers were on. It was a lot of fun.
This Valentine gable box was inspired by this Pin on Pinterest.


This lets you see the dimensions a little more. The finished size is 3 x 1.75 x 5 inches. I am still using My Minds Eye State of Heart papers, and I love how it coordinates with vintage crochet lace and some jute twine and pretty little buttons.

I can share this .wpc file with any Pazzle peeps out there. Leave a comment below and I will send it out to you.

Find inspiration everywhere! Go... Create something fun & fabulous. Enjoy!

Monday, February 6, 2012

Valentine's Whopper carton


Pin It

This is my Whopper carton .cut file I had originally posted here and here, I just added the heart cut out to the original file and saved it for Valentine's day. I also added and extra layer of patterned paper to the .cut file and two holes on the top fold for threading the ribbon through.

I am loving kraft, SU! cherry cobbler and ivory for Valentine's day projects. Gorgeous!


Here is a side view. The finished size is 2.5 x 2.5 x 5.5 inches. I wish it could be closer to the CTMH milk carton they have in their newest catalog, but there is not much paper to be found that is longer then 12 x 12 inches, and the CTMH carton is 3 x 3 x 5.5 inches. So this is as close as I could get.


This is just a detail shot to show the acetate covered heart shaped windows on the front and back of the Whopper carton. I'm all out of Valentines candy, it doesn't pay to purchase Hershey's kisses or nuggets too early around my house, so that is why this little gift box is empty. I think it will be very pretty with the cherry cordial Hershey's kisses in it, since they have the pretty dark red foil wrappers.

I'm happy to share this Cricut .cut file, I used Design Studio and George Basic Shapes to create it. If you would like me to send it to you just leave your email address in a comment below and I will send it to you.

Find inspiration everywhere! Go... Create something fun & fabulous. Enjoy!

Friday, February 3, 2012

Top note style candy purse


Pin It

These little candy purses were inspired by one of the most popular pins I have ever placed on Pinterest. Now, the original design used the SU! Top Note die and then for the patterned paper you hand cut it along the decorative stitching marks. That's too much work in my book. So I used the CTMH Art Philosophy cartridge, because it has a shape very similar to the Top Note die, to cut out the purse shapes with. My finished candy purse is 3 x 3 inches, where as the Top Note I think is closer to 4.5 x 4.5. But my cello bags were a little under 3 inches so I went with that size.


Here is a close up of the decorative paper layer and my chosen embellishments and the Life Savers I tucked inside my cello bags.


Here is a different angle since the full Top Note like shape was not visible in the other pictures. It's a cute little favor gift idea. I'm really happy with how it turned out.

It is a Cricut .cut file I have created and am happy to share. If you would like me to send one to you, please leave your email address in the comments section below.

Find inspiration everywhere! Go... Create something fun & fabulous. Enjoy!

Wednesday, February 1, 2012

Nugget Satchel


Pin It

I think this is just the cutest little gift bag, and I do mean little. It is currently holding two Hershey's nuggets. I was inspired by this pin on Pinerest. Her tutorial was simple enough but I thought I could make it easier by creating a Cricut .cut file. While I was recreating I made it wider so that it would hold a little candy.


Here is a side view. I took a few pictures of the assembly process in the case that you want to make some yourself, these will make it simpler.


After the purse part is put together, score the top decorative strip down the center. Take sharp tiny scissors and snip little sections out just wide enough for the long skinnier handles to slide through. Than tape half of the top decorative strip and adhere it to the out side of the purse. Repeat for the other side.


Slip the long skinny handle through the snipped holes just low enough so a brad poked through the outer decorative layer, the purse side and the handle strip will catch all the layers and hold them securely.


Here you see the brad from the inside. Now adhere a strip of super sticky red tape or skor tape to that half of the decorative strip and press it down over the brad backs.


Here is the flap closure attached to the back side of the purse and Velcro closure attached to the flap and the front of the purse. These Velcro dots are too much for this little paper purse, next time I will cut it in half.


And the money shot. The wrapped Hershey's Nuggets nestled in their new home. Sweet as can be.

This satchel .cut file is created on Design Studio using George Basic Shapes cartridge so if you would like to recreate your own gift purses, I am happy to share this with you. Leave your email address in the comment section of this post and I will send it out to you.

Find inspiration everywhere! Go... Create something fun & fabulous. Enjoy!
Related Posts Plugin for WordPress, Blogger...