Wednesday, August 29, 2012

Halloween decoration


I saw this beautiful saying on Pinterest. Upon opening the link and checking it out, it appears it is a huge vinyl wall decal. I absolutely do not have that kind of wall space but loved the look, so I saved their .jpg file (which I hope is not a no-no) and printed it out on cardstock and made it into a little Halloween altered frame decoration item. The 6 x 7 inch rough wood frame came from Dollartree. The awesome patterned paper is from SEI Eerie Alley line.


Here's a detail shot of the pumpkins I created from circle punches, leaf punches even little spider punches. I embellished with doodles using Sakura gel pens.


Here is a SU! bat punch attached to a large circle punch moon. Again the bat is embellished with gel pen doodles.

Find inspiration everywhere! Go... Create something fun & fabulous. Enjoy!


Thursday, August 23, 2012

Folded paper Christmas ornaments


These cute paper ornaments were Pinspired, of course. The original creator used Nestabilities to cut out all of her shapes. I used my Cricut and CTMH Art Philosophy cartridge in the Design studio software. I used 4 sheets of Authentique Festive collection cardstock weight patterned paper. It is GoRgEoUs paper. Heavy weight and lightly textured and just feels rich and luxurious. I really love the traditional colors and patterns, especially the music sheet, so I wanted to use it to make something that I would be able to enjoy for a long time. Voila! Success. From the four sheets of paper I was able to cut enough pieces to assemble 6 ornaments in 3 different sizes.


Here is a close up shot. I used my ScorPal to score each shape down the center and the bone folder to get a very crisp fold. I did discover after having completed a few of these that the easiest way to keep them lined up as you are gluing is too put liquid glue, I used the 1 inch wide Zig glue pen, on half of the shape. Lay it on your covered work surface and press the next shape onto it. You have a few seconds to wiggle them around to get all the edges lined up, then repeat on the half of the piece that you just pressed down.


Continue gluing and layering through 8 pieces. Before you glue and attache the top half to the bottom half of the stack of folded pieces you want to be sure to put your string and embellishments through the middle of the ornament. I threaded a few beads onto some CTMH Hemp cord, doubling it for a loop on the top and tied a knot at the top of the ornament and at the bottom also. This way the cord will not pull through the center of the ornament while hanging on the tree tempting playful kitties or children.

It's a very simple .cut file I have created, but if you would like it. You know what to do. Post a comment below, including your email address, and I will send it out to you. Then you just find the prettiest papers and the rest is quick and easy.


Find inspiration everywhere! Go... Create something fun & fabulous. Enjoy!

Tuesday, August 21, 2012

Scrap grid Christmas card


I had scraps laying about on my crafty work space. So I looked for a scrappy idea and found one here, on Pinterest of course. This is the new CTMH Pear and Partridge papers and the sentiment is CTMH Holiday wishes. I distress inked and pierced around my newly created acetate label pieces, I debuted here in my last blog post, to create a frame around the sentiment. It's a quick and simple card crafted from leftovers. I like it.

Find inspiration everywhere! Go... Create something fun & fabulous. Enjoy!

Sunday, August 19, 2012

Quilted Christmas cards


OK, I am just going to stop apologizing for making Christmas cards this early in the year. I can't help myself, its my favorite season and I love the papers, old and new.

These four Christmas cards were inspired by this pin on Pinterest, another Pinspiration that I saw and instantly had to try my hand at it. I love patterned paper and I love LOVE LOVE cards with lots of layers and patterns and textures. So this design was perfection to me.

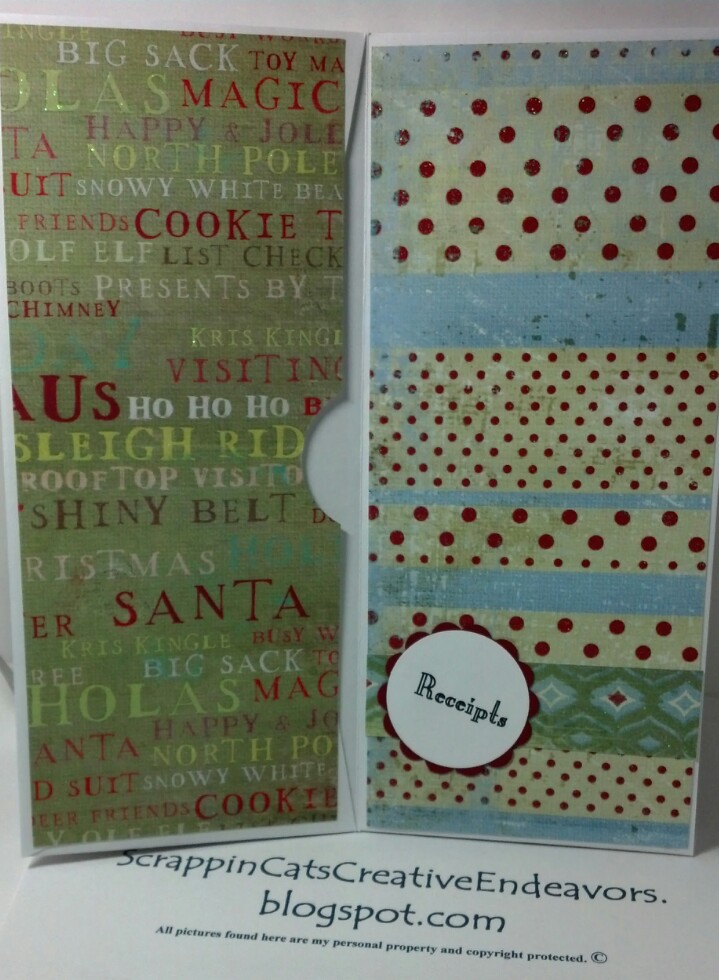
There is a 4 1/8 x 5 5/8 inch CTMH Cranberry cardstock layer that all the patterned paper is attached to.  I then cut 4 pieces of coordinating CTMH Mistletoe patterned paper at 4 x 5.25 inches. I then cut all four pieces at 2.5 inches along the long edge, then cut that 2.5 x 5.25 piece in half again at the 1.75 inch mark. The other 1.5 x 5.25 inch piece I cut in half at 1.75 inches also. So now you have four patterns cut into four pieces each. Now lay them out to create the quilted design you see above. I distress inked all of the patterned paper edges and then glued the pattern pieces to the cardstock base. I like the glue sticks for this job, I feel like it gives a better finished embossed design than just taping around the edges of each piece. I am not sure how much detail you can see in the photo but I ran the entire card front through my Cuttlebug in an embossing folder.


All of the stamped shapes are cut on the Cricut from CTMH Art Philosophy cartridge.


The CTMH Cranberry cardstock layer is cut at 3.5 x 1.5 inches. The CTMH Colonial white layer is cut at 3.25 x 1.25 inches. Perfect for stamping the CTMH Holiday wishes sentiments on.


See how I distress inked inside, leaving a bit of a border?


And see how I pierced around the edges of each stamped label?


I cut the label shapes from a piece of recycled acetate, packaging from something, saved just for such a project. I cut each of the label shapes at 3.12 x 1.12 inches so that they will leave a slim outline on the smallest label shape cut from cardstock. I decided to try this inking and the piercing idea because of tutorial I have seen where people ink inside the Nestability shapes after they are cut out. And also how SU! is creating piercing templates for all of their new Framelits. So this is my FREE way of mimicking those abilities. Pretty cool, huh? I think it will be very handy.

As always, I have already created these .cut files, and I am happy to share them with you so you don't have to spend time recreating them. So if you like this idea and would like the Cricut Design studio .cut file please leave a comment below. Include your email address so I don't have to go searching to see if it is available on your Google profile. That's no fun for me. It cuts into my crafting or Pinterest time.  ;) Thanks.


Find inspiration everywhere! Go... Create something fun & fabulous. Enjoy!

Sunday, August 12, 2012

Christmas cards


I was on a roll this weekend. I finally got my paper crafting mojo back. My first creation was due to the Pinspiration here, I loved the butterfly version but have been working on Christmas card ideas for a class I will help design for again this year.


This card was inspired by this pin. I think it is sweet and simple and perfect for these beautiful CTMH papers.


Here is a second version of the same card, just changed up the papers. These are this years CTMH Christmas papers Partridge and Pear. Pretty and a little unconventional.


And this is a repeat of a card I first posted here on my blog. I changed up the papers for this one. I like the cute banner layout.


Find inspiration everywhere! Go... Create something fun & fabulous. Enjoy!

Friday, August 10, 2012

Envelope prayers & gratitude journal


This is a repeat project. It's another super simple but totally wonderful envelope mini album. I showed my first version of it here, it was inspired by this Youtube video tutorial. And I was so happy with how quickly it went together and how functional it is, I immediately started on a second one.

This time I used really nice quality heavy duty business sized envelopes in ivory for the base. To that I added the gorgeous CTMH Florentine patterned papers. I then stamped using CTMH ink in Twilight with CTMH You & Me, Today's Date and Florentine Workshop stamp sets, on each page.

I copied some Bible verses from biblestudytools.com and formatted them on a word document so that they would be the correct size to punch out using the SU! Decorative Label punch, to use as embellishment on each page. A different verse to read and encourage each month.


January
Jeremiah 29:11 For I know the plans I have for you," declares the LORD, "plans to prosper you and not to harm you, plans to give you hope and a future.


February
Romans 15:13 May the God of hope fill you with all joy and peace as you trust in him, so that you may overflow with hope by the power of the Holy Spirit.


March 
Isaiah 40:31 But those who hope in the LORD will renew their strength. They will soar on wings like eagles; they will run and not grow weary, they will walk and not be faint.


April
John 16:33 I have told you these things, so that in me you may have peace. In this world you will have trouble. But take heart! I have overcome the world.


May
Deuteronomy 31:6 Be strong and courageous. Do not be afraid or terrified because of them, for the LORD your God goes with you; he will never leave you nor forsake you


June
Proverbs 3:5-6 Trust in the LORD with all your heart and lean not on your own understanding; in all your ways acknowledge him, and he will make your paths straight.


July
Philippians 4:6-7 Do not be anxious about anything, but in everything, by prayer and petition, with thanksgiving, present your requests to God.  


August
Psalm 55:22 Cast your cares on the LORD and he will sustain you; he will never let the righteous fall.


September
2 Timothy 1:7 For God did not give us a spirit of timidity, but a spirit of power, of love and of self-discipline.


October
Isaiah 55:12 You will go out in joy and be led forth in peace; the mountains and hills will burst into song before you, and all the trees of the field will clap their hands.


November
Psalm 119:114-115 You are my refuge and my shield; I have put my hope in your word.  Away from me, you evildoers, that I may keep the commands of my God!


December 
John 14:27 Peace I leave with you; my peace I give you. I do not give to you as the world gives. Do not let your hearts be troubled and do not be afraid.

There is a simple calendar page printed on cardstock slipped into each envelope. To note prayers and praises daily.

If you have a desire to make a project that would use these Bible verses punched with this punch, I am happy to share my word document with you. Just to save you the time of formatting and testing and reformatting. Just leave a comment below with your email address and I can send you the word document.


Find inspiration everywhere! Go... Create something fun & fabulous. Enjoy!

Sunday, August 5, 2012

Envelope Christmas organizer


Aaaaakkk! Another Christmas project. I know it's early but I was inspired by this Youtube video, it seemed so easy to put together that I started playing around with it right away. I decided to use business sized envelopes to allow for longer pockets and more design space. Once I had the body of it put together it just seemed perfect for a Christmas organizer.

Above is the outer cover. I used ribbon to create a little bit of binding and a space to hold a pen and pencil. The mini album definitely has room to expand, so I made sure to give plenty of expansion room to the ribbon loop as well. I kept the decorations to a minimum, more function then fluff, is my desire. I left room for adding photos on every page, so it can double as a mini December daily album also. All of the patterned paper pieces that I cut were 3.75 x 9.25 or 4 x 9.25 inches for the pockets and the facing page, so that gives you an idea of the photo area available.


This is the first 2 pages, holding the Dates To Remember list.


Pages 3 and 4 above, hold the To Do list.


Pages 5 and 6 are for the To Make list. My favorite. :)


Pages 7 and 8 are for the To Buy list. Oh, I hope I get on this early. Online. And done early. That will make me a happy gal. I don't mind going to the stores, when I am not frantically doing it at the last minute. Leisure is the name of my game.


Receipts are held in the pocket of pages 9 and 10, and I actually have some overflow area in the very back just in case this gets a little stretched out.


Ahh, my second favorite list is the To Bake list here on pages 11 and 12. So much inspiration found here on my Sweets Recipe board on Pinterest.


Pages 13 and 14 are ready to hold any clipped or hand written recipes.


And last but not least is the overflow area. I flipped the last envelope around so the pocket is facing inside and the outside cover is solid. The patterned papers all came from My Minds Eye Sweet Dreams paper pack. I printed all the labels on my computer using CK Stylish font and then punched it out with a 1.75 inch circle and layered that on a 2 inch scallop circle punched out of SU! Cherry Cobbler cardstock.

The Youtube video is excellent. It really is an easy mini album to put together and because of all of the pockets and storage space it makes an excellent Christmas organizer. Yahoo! Here is to being organized so that I can spend more time in leisure, with my family, during the most wonderful time of the year.

Find inspiration everywhere! Go... Create something fun & fabulous. Enjoy!
Related Posts Plugin for WordPress, Blogger...