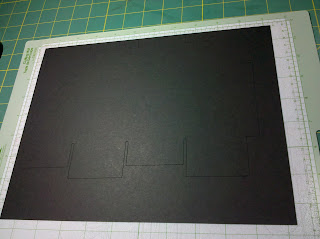
I include this first photo just to show that this will fit on an 8.5 x 11 piece of card stock. I lay it on the mat about .25 inch in from the lead corner.
This is the first set of score lines. I use my scor-pal and move the paper around to line up the cuts along a score lines. What my written instructions lack, I hope my photos make up for.

The two triangle folds are probably the hardest for me to explain. I find the center of that section, then I score from the center point out to the corners. Then I fold and press all my score lines for crisp folds all around.

Flip the paper over, and adhere your decorative paper now. I found out the hard way, it is much easier to adhere it now rather then after the box is all assembled. Also notice I have run tape along the two half inch tabs all the way to the left in the photo and the two shortest tabs across the bottom.

To line up the sides I fold the whole thing in half and while being mindful of the tabs that still have tape, making sure to not stick them to each other, I press the sides together to make the body of the carton.

Fold the two short tabs in and press down the far left tab, so that it looks like below. Then press down the last taped tab and that gives a nice seal to the bottom. This is especially important when you stuff it full of candy, you don't want a blow out.

This is the top with the triangle folds aimed inward. I used my Crop-a-dile to punch two holes in the two top tabs. Line them up and hold them closed and punch through the two layers at one time. I ran some ribbon through the holes as the closure. This way the recipient can open it, empty it of the sweet treats and hopefully keep it and enjoy its decorative cuteness long after the candy is gone.


Love these!! Too cute!! I would like the cutfile but have a few questions... What carts did you use? And is it a gypsy file or design studio?? My email is kmbrlysue22@yahoo.com!! Thanks soo much!! :)
ReplyDeleteThese are absolutely adorable, I would love to have the cut file or gypsy file.
ReplyDeletethanks,
Christi
fillhardfarm at ymail dot com
These are some very clear instructions!! I wish I could convert it to cut on my Pazzles!
ReplyDeletelove the boxes and the instructions are very easy to follow. i think they are easy enough for granddaughter to follow she is 9 this is what she would be doing this weekend hopefully. please send to ** bainessister@yahoo.com
ReplyDeleteLove, love, love these. And love your blog. I would love the cut file. Thanks so much for sharing.
ReplyDeletelgottschalk@hotmail.com
This is great I did the small ones for mother's day for womens church group and they loved them. Would like the cut for the larger ones. These would be great for Halloween treats. Great work and thanks for sharing.
ReplyDeleteJackie
Hey forgot my email duh old mind at work here when it does show up for work. jacthom@verizon.net again thanks for sharing your talent with the rest of us who don't have any.
ReplyDeleteThank you for adding these wonderful directions. I have not tried to make one of these yet but can't wait until I have time to play.
ReplyDeleteAgain, thanks for sharing the cut file and the directions with us.
I have just requested the mini cartons/carrier and have now seen these directions. This also looks great. Would you mind sending me this cute cut file as well. My address is
ReplyDeletepm_cunning@yahoo.ca.
Thanks - Pat
Please send the cut file to rab1127 at aol dot com. thanks so much!
ReplyDeleteJudy
Thank you for sharing love your projects.
ReplyDeletetalumar at sbcglobal dot net
This is a really cute carton. I would also love the cut file. Thank you for sharing the directions. My email is CTMHinnev@aol.com
ReplyDeleteDebbie
This is a nice size for guys...being a little larger. I would love to try and do this one also. And also, thankyou for the nice instructions..easy to follow.
ReplyDeletetfs
bobbi
GRAMMIZ_1@YAHOO.COM
I really like this can I get the cut file please.
ReplyDeleteronnieandtammy@hughes.net
Can I have this cut file too?
ReplyDeleteThanks,
Brandy
I would love this cut file please. ikennic at q dot com. I received the cut file from you for the mini milk carton and the crate that holds 2 and I love that one. Just did it up. I am looking for something bigger and this whopper one looks just like the right thing. Thanks for sharing and thanks for such great inspiration!!! I love your blog!!
ReplyDelete