Saturday, October 16, 2010

Halloween treat holder .cut file

Woo hoo! I learned how to save a gypsy file as a Cricut .cut file. All thanks goes to my super smart friend Brandy, she found an awesome you tube video that educated me on converting .gypsy files to .cut file. THANK YOU, THANK YOU, THANK YOU Brandy, for this and so much more. You are the bomb!

These are the proof that it works. I converted the file and then test cut these. I think they are sooooo cute. So go ahead and leave me a comment (including your email address) if you would like the .cut file or the .gypsy file for these cute treat holders. I used Disneys Mickey and friends for the decorative layer, the bright green in this picture and George basic shapes for the base piece of the holder.

Add a ribbon tie through all the layers, including the top of the cellophane bag that holds the treats. A little bling, this time I used Distress Stickles in marmalade and Glitz Stickles in grape. Voila! Adorable gift ready to give.

Find inspiration everywhere! Go... Create something fun & fabulous. Enjoy!

Sunday, October 10, 2010

Toilet paper roll mini album

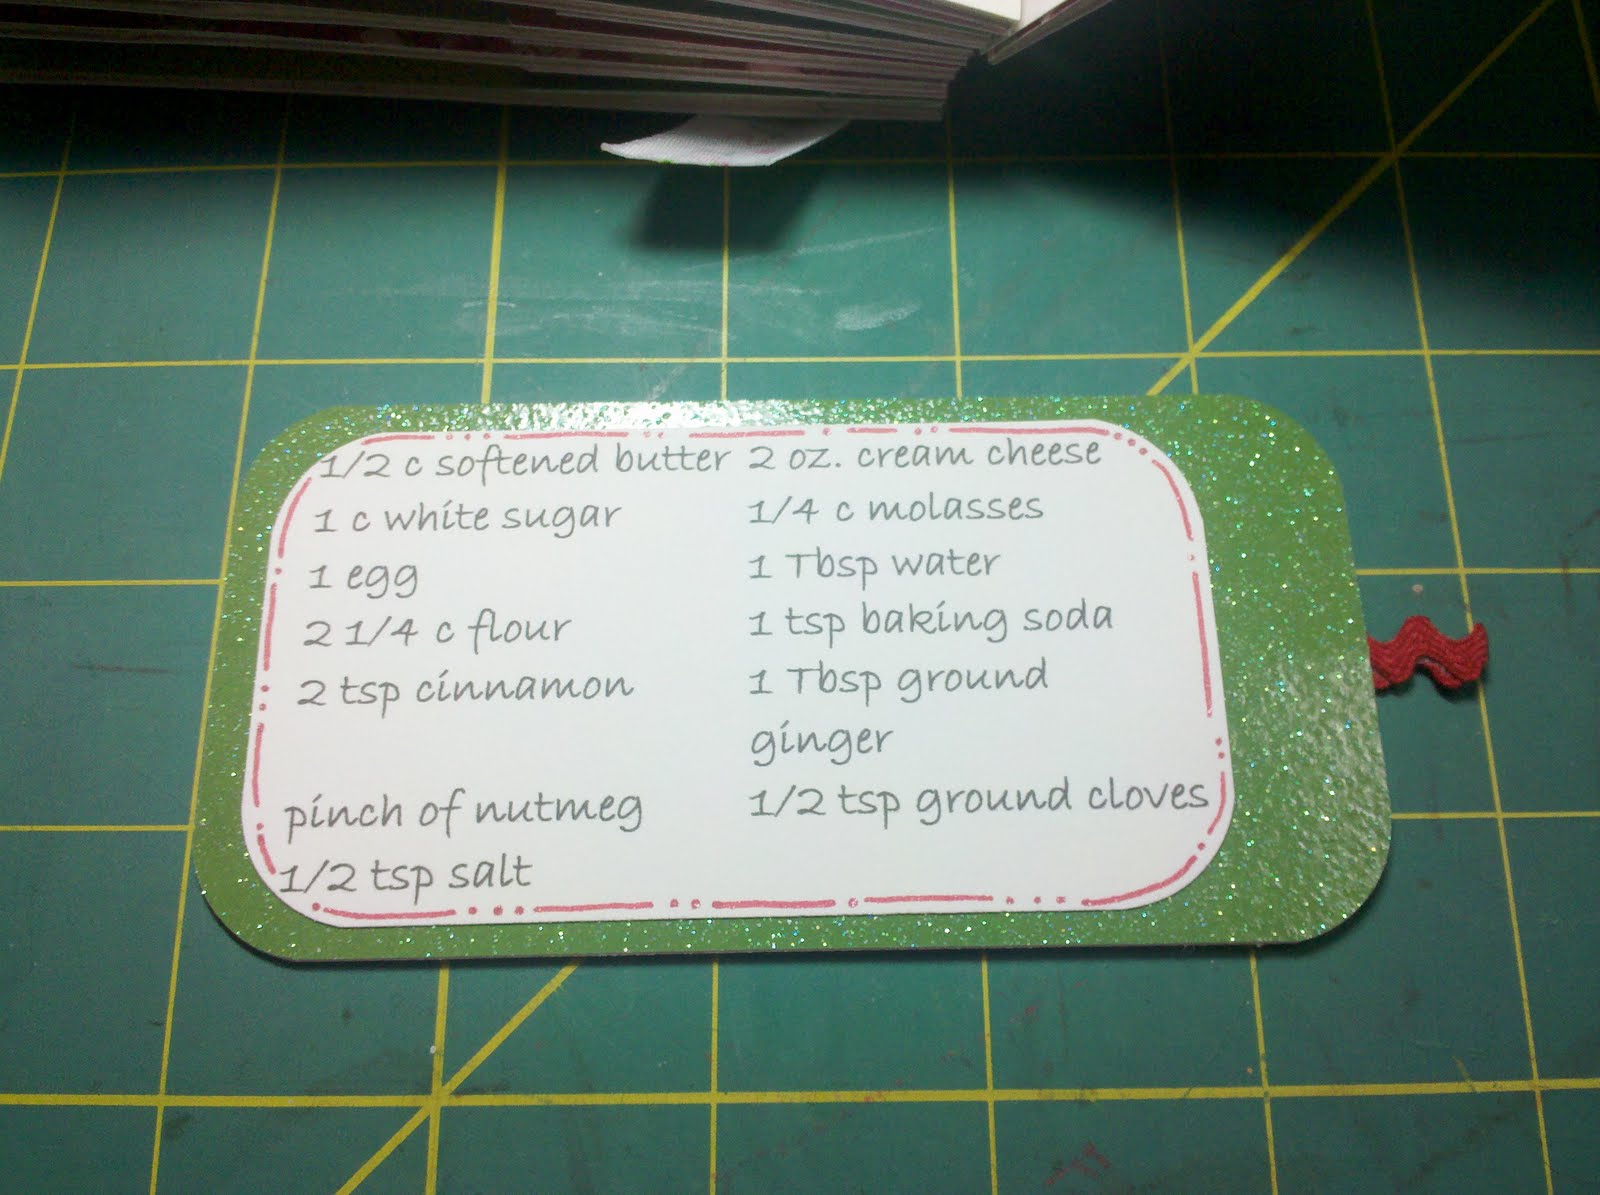
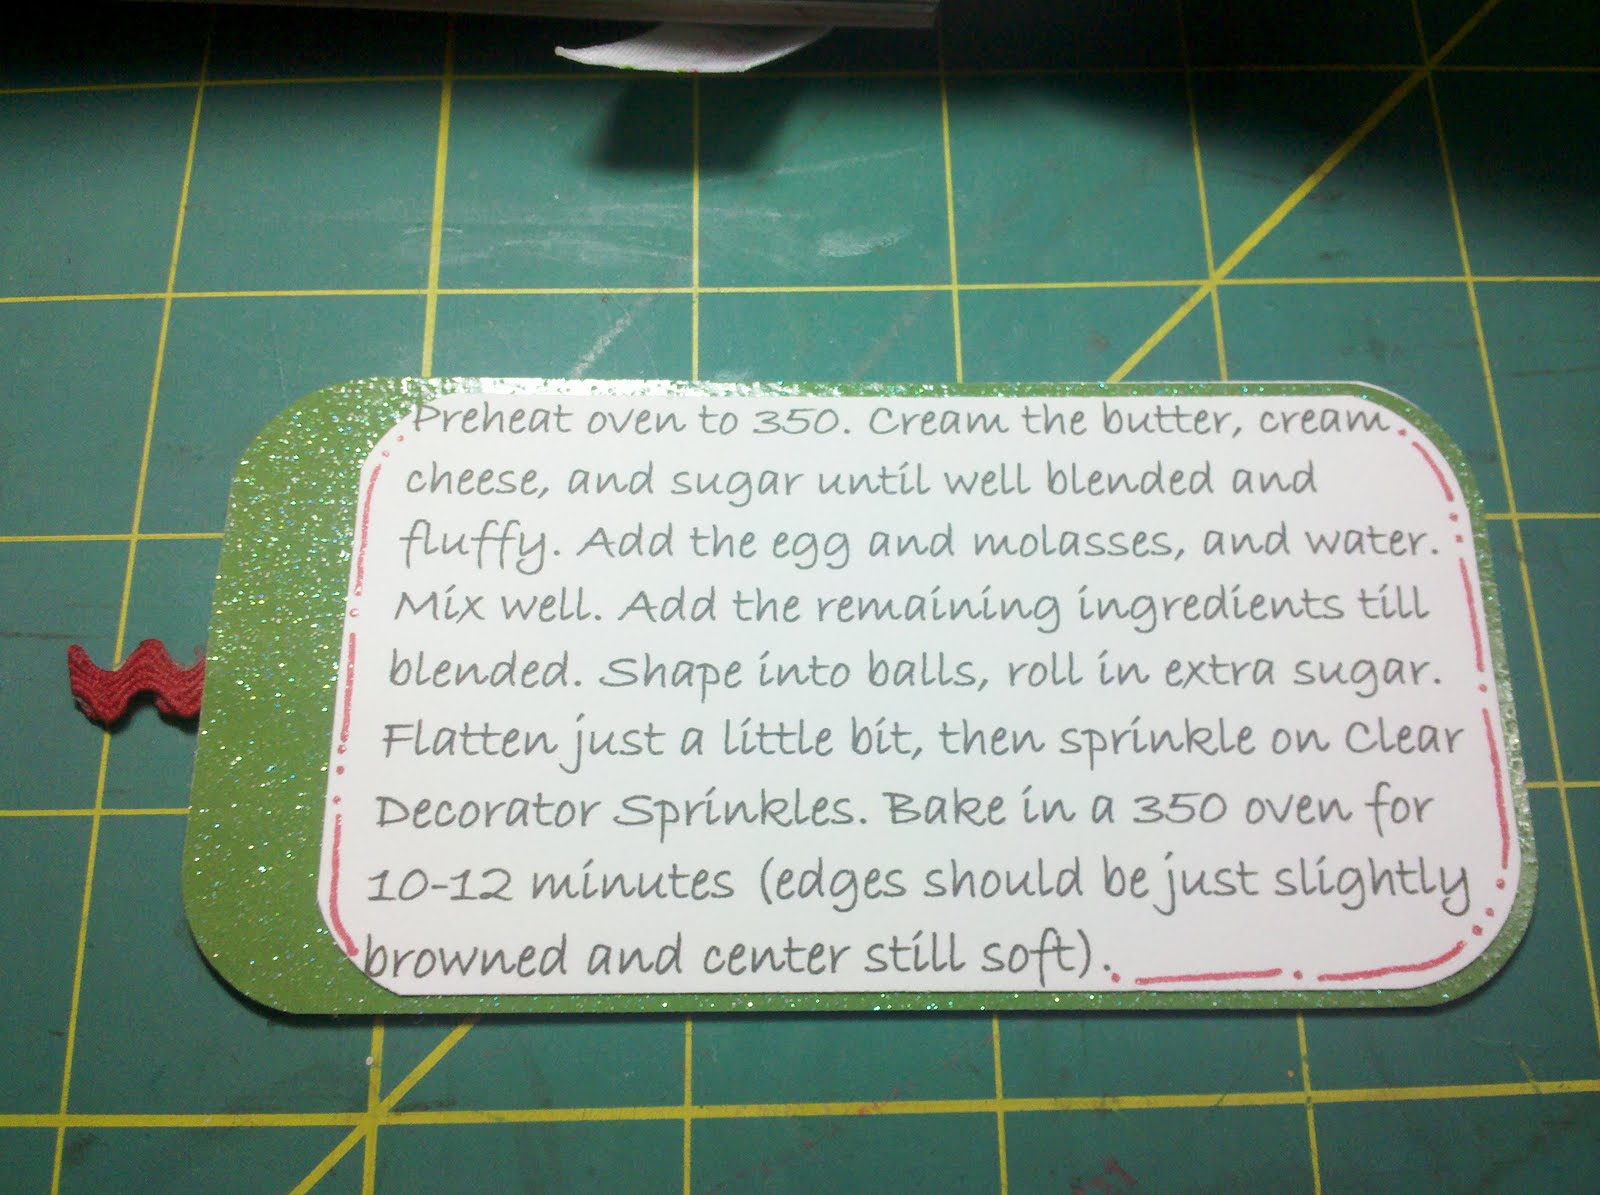
I made another mini album out of toilet paper rolls last weekend. I meant to get around to this post earlier this week but time just got away from me. Its full of cookie recipes, pictures and all.

The tags hold the recipes. Ingredients on the front, instructions on the back.
I used the DCWV Christmas matstack from last year or maybe 2 years ago.
I kept the decorations simple. The only embellishment is ribbon used for the tag pulls and to tie the whole book together.
I did some doodles and dots and stitching and such with my Speca pens. They doodle gorgeously. Love them.


I typed up the recipe on the computer. The most time spent on this whole project was on sizing each recipe to fit on a 2 x 4 inch piece of paper.
I kept it simple by using the same font throughout the whole book, but I did shrink the size or enlarge it to make it fit into the size available on the tag.

Here you can see the ribbon pull tabs I created by sandwiching a length of ribbon folded in half, between 2 pieces of cardstock. I staggered them from tab to tab, so they would more visible and easier to grab.

I think the finished project is adorable, recycling at its best. I will enjoy pulling it out with the Christmas decorations each year.

Find inspiration everywhere! Go... Create something fun & fabulous. Enjoy!


Monday, October 4, 2010

Halloween treat box


Isn't this a cute lil Halloween treat box? My friend Brandy designed it on her Gypsy, then I got to borrow it and cut one out. (OK actually 6, I was doing a lil fine tuning. But once it was perfect, this is the outcome.)


Here is the naked box. No embellishments, just the cuts from the Cricut .cut file.


See how fantastic it is, all loaded up with tasty sweets? If you like this .cut file and want a copy of it, leave me a comment including your email address. I would be happy to share. Thanks for stopping by.


Find inspiration everywhere! Go... Create something fun & fabulous. Enjoy!

Sunday, October 3, 2010

Halloween treat holder


Its been a week where I have started a half dozen projects and not really finished anything. I am all over the place right now, inspired by Halloween, Christmas, presents, treats. Oy! I can't seem to settle my mind. I flit here and there. Thankfully this adorable little treat holder tutorial was quick and simple. I found it at Club Anya. Even better, I was borrowing a good friends Cricut Gypsy (big thanks to Brandy!!! Now I'm hooked and have to have one ASAP) So I made this simple design to cut out using the Gypsy and my Cricut. This is the finished project. Full of Halloween sweets.

This is a side view, just so you get the general packaging idea. Super simple, but cute, CUTE, CUTE!

Unfortunately until I have the Gypsy software on my computer. I can't save the file, so I can not offer to share the file. YET. ;) It is simple and the tutorial at Club Anya is great, so don't be afraid to cut..them...out...manualy... I know, I know. I'm so spoiled by my Cricut.
Find inspiration everywhere! Go... Create something fun & fabulous. Enjoy!

Monday, September 27, 2010

Paper pumpkins

I went a little crazy making these "too cute to spook" paper pumpkins. I found this wonderful tutorial at makeminelime.blogspot.com her 09-02-10 post. These are super simple and go together quickly, but they pack a punch in cuteness! I changed up her measurements a bit. I like to maximize my paper usage whenever possible. So these 6 pumpkins were made from 2 12 x 12 patterned papers and 3 8.5 x 11 card stock papers with very little left overs. But you know me, I already have plans for those scraps. So stay tuned, you should see these patterns and papers show up again soon. ;)
The details: I cut the 12 x 12 patterned paper at 6.5 inches, so we also have a 5.5 inch piece. Than I cut both pieces into the 1/2 inch strips. I cut the 8.5 x 11 card stock at 6 inches, so we also have the 5 inch piece. No fuss, no muss and mostly NO WASTE. The rest of her tutorial I followed to the letter. I love tutorials with pictures. I am definitely a visual learner. 

Find inspiration everywhere! Go... Create something fun & fabulous. Enjoy!

Sunday, September 26, 2010

Altered journal - Christmas planner


I am so excited about this project. For one reason, I have looked at these for a few years now and been dying to make one. I am a total list maker...(confession time here) and I have lil notes everywhere. So this just screams out to me, make me, make me.... For another reason, I am a gal who prefers to start anticipating Christmas early. I feel like starting early makes me less crazed during the actual season and I just love the whole fall and winter, Halloween to Christmas time! WAHOO!!!! Bring it on.

Aren't these papers gorgeous. It's all all I have used so far, this year for my Christmas projects. It is CTMH's Mistletoe papers and I love them! To decorate the front cover I used CTMH's Snow Flurries stamp set (D1384) and taking a cue from the patterned paper I made a ornament and hung it on a ribbon with a bow. I stitched the bow on through the 2 paper layers before I adhered it to the front of the book. I'm hoping that will make it much more sturdy then a glue dot.


I divided my composition book into 4 sections and covered a page with card stock and patterned paper at the beginning of each section. The strips of paper actually create pockets. I wish I had thought to stick a receipt in one so you could see this in action. There are 2 pockets on the front of each divider and 1 deep pocket on the back side of the same page.
See, this is the back side of the first divider.

Another section divider, with 2 more pockets.

The back side with 1 big pocket, again.
You get the idea, right?

I just have to say CTMH's Cranberry red is my fave. Gorgeous! I love the traditional Christmas colors best.
And snowflakes!!! Another favorite. Yeah this paper pack is pure perfection.


So, here are the tabs. I put them across the top of the book because I will slide it in and out of my work bag each day. This will save them getting mashed, I hope. I printed them on the computer, To Do, To Buy, To Bake and To Create. Then I punched them out with the SU! label punch, ran them through my Xyron and attempted to evenly space them across the top. Attaching them to the dividers.

Some things I learned during my research to make these altered books. I did not mod podge this cover. I have not had consistently great results with mod podge. Sometimes it warps or bubbles. So I used Scor-tape and placed it ALL the way around the outer edges of the covers, and added some of my Scotch ATG gun tape to the centers for additional adhesion. After I adhered the paper (which I intentionally cut wider and longer then the cover, just to give me some wiggle room) I used a nail file and sanded off the 3 outer edges. Its a much neater edge (IMHO) then attempting to use a xacto knife or scissors. If you hold the file fairly straight up and down to the edge of the cover and only rub the file against the edge on the downward motion you don't get a lot of distressing or removing the color from the decorative paper along the outer edges. For the dividers throughout the book, I did not cut the papers exactly as wide as the page. This would have added a lot of bulk against the binding and made the covers stand up to make room for the extra bulk. I left a little less then .25 inch gap, yes the lined white paper shows through at that gap but I thought it was a good trade off too keep the composition book closing flat. I also used the super strong Scor-tape for the papers that would create the pockets, but for the decorative pieces I used the less expensive Scotch ATG gun tape again. That's all the tips and tricks I can think of right now.

I anticipate great productivity and organization with this gorgeous altered composition book/Christmas planner. I see more of these in my future: Disney planner, Books/Movies/Websites lists, Crafts planner. Oh my, what about the smaller cute composition books for a passwords book? I don't know about you, but I can not remember all the combinations of user id's and passwords for all of the different message boards and websites I belong to.  I'm rambling, I will sign off now. Thanks for stopping by.

Find inspiration everywhere! Go... Create something fun & fabulous. Enjoy!

Saturday, September 25, 2010

Snowman Christmas Cards

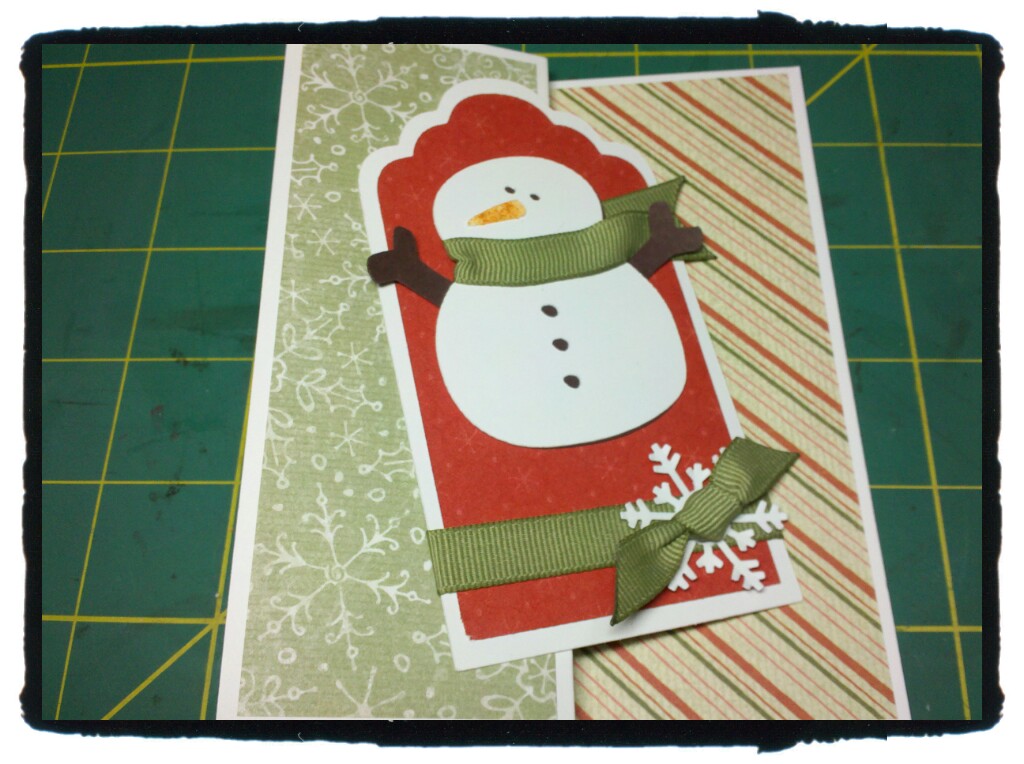
I found this awesome youtube tutorial, The twelve days of Christmas. It was from last year and the lady made 12 different Christmas cards with her Cricut. They were all adorable but this snowman design was my favorite by far. So I copied her design practically verbatim. I changed up the paper and ribbon and I didn't add buttons just so they will go through the mail easier, but other than that this is her cutey patootey design. You can find her under cardcrazy09 and this design is #11.
Here is the close up.
This is the inside. The card is called an S fold card.
I did this on Cricut design studio using Doodlecharms cartridge. I did save the file, it cuts 6 snowmen and 6 tags, upper and lower layers. If you would like this .cut file just leave me a comment (please be sure to leave your email address :) that is kind of important.) Thanks for stopping by.

Find inspiration everywhere! Go... Create something fun & fabulous. Enjoy!
Related Posts Plugin for WordPress, Blogger...